Quests: Brains or Brawn, Pledge of the Merchant Princes (primary)
Talk to Zerai the Learner by the fountain. He's got two quests for you, including your next primary. Seems the princes have summoned you. Hey, we're not djinn, stop that. His other quest is
him worrying about his sort-of girlfriend (you met her back in Istan if you're a NF-born char) and wants your help choosing a bodyguard for her. Yep, he's talking about Chatterbox Norgu and
Kamikaze Goren from the previous mission. Just so you know, when you choose a bodyguard for him you'll get the one you didn't tell him about as your next hero (after another quest, of course).
Also, although you met Norgu in the MoW split and Goren in the Margrid split, whether you chose MoW or Margrid doesn't affect choosing Goren vs Norgu. Anyway.
If you followed my instructions before, you should all have the Mihanu Township map dot on your maps. If not, you MoW-followers should go west from Grand Court to find it. The rest of you just
map there, and all of you go north out into the Holdings of Chokhin. Head to the palace (take the right path and head north) to find the princes just inside. Apparently they've finally decided
to believe you and swear to give you any assistance you require. Suddenly, some chick shows up behind you saying that she's got a message from Kehanni and she's being chased. Go out the way
she came in to find a small group of margos attacking the guards outside. There's only like four of them so kill them, then talk to the screaming chick. Map to the Grand Court and go out the
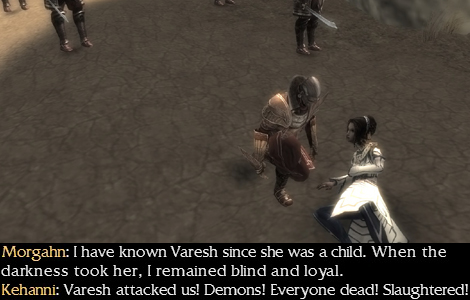
east exit. Head south a bit to find a bunch of Kournans, and Morgahn. What do you want, Morgahn. Lower your weapon first and then maybe we'll think about lowering ours. Well, go see what he
wants. Wait, what? He's actually blind? And someone gave him a spear. What. Now I REALLY want him to put that spear down. ^.__.^;;

Required Hero: Tahlkora, Master of Useless Exposition
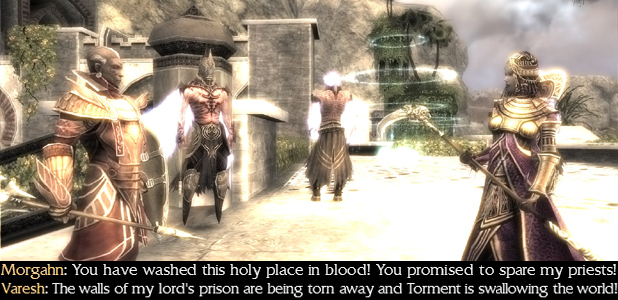
Aaaagghhh, Kehanni! Quick, someone cast Restore Life! ... oh right, Kournan priests don't have res spells. ^<__<^;; gg Kournans. Also, Varesh, you might wanna... see a dermatologist... about
what's going on with your face. ^.__.^ Talk to Head Priest Vahmani for your quest reward. He says that some giant demon is in the temple floating up in the sky. ... maybe if we disenchant
the platform it will crash and kill the demon? No? Baw. Alright guys, both of my walkthrough chars have LB r1 by now but you're gonna want at least r2 before doing this mission. Make sure you
talk to the Seeker of Whispers [Lightbringer Ranks] in the Chantry of Secrets to get your first LB "skill" (which is actually a buff that gives you +5% dmg against and +1 dmg reduction vs margos
and other demons, and you must be displaying your LB title (click on the box next to it in your H menu under Titles) for it to be active). He's got two more LB skills which you get at r2 and r3,
but IMHO LB Gaze (r2) is much better than LB Sig (r3). Plus, you can only have, what, three PvE-only skills on your bar at a time? Sunspear skills (including that special res sig from oh-so-long
ago), Kurzick/Luxon skills, and the GW:EN Asura/Norn/Ebon skills also count as PvE-only skills. LB Gaze not only does dmg but also interrupts the target, which will be very very useful in the
upcoming mission, so go get to r2 and come back to the Chantry to get LB Gaze. LB Sig is just gain X amount of adrenaline and energy, so not quite as useful. (by the way, any LB bounty guy will
NOT give you any more bounties if you've reached r1 and haven't gotten the buff yet, so make sure you do that first) Your best bet for this is probably grabbing the ele hunt bounty just outside
the Kodash in the Mirror of Lyss, then clearing out all of the evil djinn and ethers in the area. The bounty is on your left when you exit the Kodash. From there continue north to the evil ether
boss, then make your way east around the southern end of the Grand Court, then SE towards Honur Hill, then north towards Dzagonur Bastion, lather, rinse, repeat til at least r2 (or higher if you're
that bored. LB points will be easier to get soon enough). Yeah, there are some margos out here, including a boss, but it's an ele bounty not a margo bounty. Once you hit LB r2, grab your new
LB skill, put it in your bar (I highly suggest all of your human party members have it with them), make sure your LB title is active, then map back to Grand Court, put Shorty in your party, and enter mission.
Read the next paragraph before entering mission.
OK guys, this mission is kinda annoying. You basically have to capture three different points with margos everywhere. As usual, there will be a bar in the upper-left corner of your screen
that goes down while you're capturing something. The capture points will sort of recapture themselves in favour of the margos even without any margos near them so you need to move quick. You
don't need to worry about capture points you've already fully captured once UNLESS the bar for it refills completely, at which point they become active again. You must fully close all three at
some point without them reopening in order to finish the mission.
There are also torment claws, those things that came out of the ground in whatever previous mission you did, at each capture point. If you came here from another campaign you'll have some
experience with these. The important thing is to NOT get anywhere near these things, as they have a very strong melee attack. You can interrupt this skill (Torment Slash) with your new LB Gaze
skill, but you might want to save it for interrupting more important things like the margo eles or the boss and just keep your distance from the claws. The bonus for this mission is just a time
trial (finish the mission in under 6min) so the faster you get this stuff done the better. Also, there's another bar at the top left of your screen which indicates the capturing of the Altar by the margos. If this bar gets filled
it's automatically mission failed so you're going to be doing a lot of running back and forth from the altar to the other capture points. As soon as the mission starts you're going to want to rush the Altar (straight ahead, in the middle), stand
right on it, and take out the initial wave of margos. This is very important cause if you stop to think much right now they will capture the Altar and you'll have to start over. The boss isn't
actually difficult at all, however he does spawn three Unbound Energies every time he dies, and he will respawn from any Margo-captured capture points rather quickly and move towards the Altar
again. He doesn't come into existance until around after you kill the initial waves of Margos at the altar, which is another reason why you need to keep an eye on your compass at all times.
Speaking of this guy, his Unbound Energies can be really painful but they take a LOT of damage from LB Gaze, even at only LB r2, so if you save LB Gaze for them then you won't have much trouble.
Just move fast, keep your eye on the compass, and capture rifts. Oh yeah, one more thing: Unlike other capture bars, the bars here don't have two colours. i.e., they don't go all the way down
then all the way back up again with another colour indicating you've captured it. Capturing the points for this mission just means emptying the bar, so don't waste any time waiting for the bars
to fill back up with another colour. Alright, moving on.
So yeah, as soon as you load, rush the Altar and destroy the first waves of margos (priority targets are sorcerers and clerics). They will come to you, so just stay parked on the Altar. Once
they stop coming towards you, run to the NE to find the first capture point. Stop right within aggro range and kill as many of the mob there as you can, but keep an eye on your compass as The
Blasphemy (the previously-mentioned boss) will spawn around the time where you finish killing the waves and start slowly walking by himself towards the Altar (sometimes he will run though). It
might be easier if you leave just one of your party members parked on the Altar the entire mission to slow the Blasphemy's capture of the Altar and also to let you know when the Blasphemy shows
up. Once The Blasphemy shows up or the rift mob (minus the claw) is dead, run back to the Altar, kill The Blasphemy, LB Gaze his Unbound Energies, then run back and kill the claw and finish
capturing the NE rift (you will probably have to run back during the capture to kill The Blasphemy again. Just do that and then finish capturing the rift, then run back to the Altar, wait for
the next Blasphemy spawn, then move on to the NW rift). Repeat the process with the NW rift (kill the mob minus claw, run back to Altar and kill Blasphemy, run back to NW rift and finish capturing
it, then run back to Altar), then finally move on to the last rift. Unless one of the other two rifts has reopened, you can just stay here at the last rift and kill The Blasphemy as he spawns,
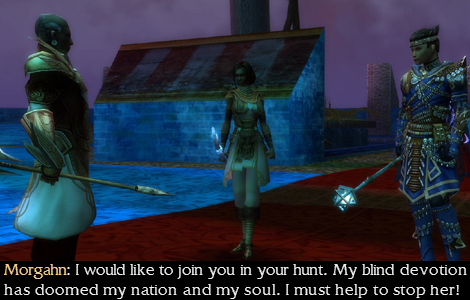
since he only spawns from open rifts. Once the last rift is closed, it takes a few seconds for the game to realise you're done, and then the cinematic plays. Morgahn decides he wants to help
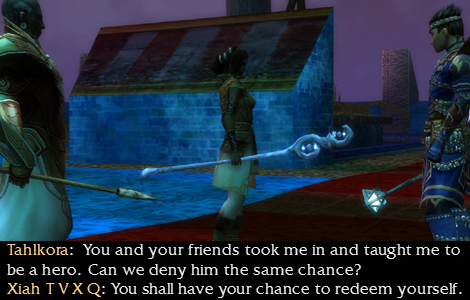
you find and kill Varesh, but considering he was her right-hand man until like 2secs ago we understandably have our doubts. Tahlkora decides we need to give him a chance, saying that we taught
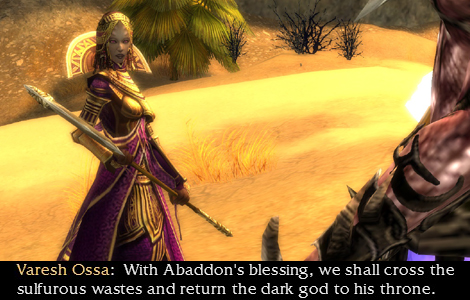
her how to be a hero, so perhaps we should teach Morgahn too and give him a chance to make up for what he's done. Meanwhile, nothing seems to even slow Varesh in her mission to unleash Abaddon
on the world, not even the fact that we keep killing all of her giant demon things.

Quests: Attack at the Kodash (primary), Goren's Stuff: Part 1 (Goren split), The Role of a Lifetime (Norgu split), A Brief Introduction, Total Corruption, Battle of Turai's
Procession, Between a Rock..., For Your Ears Only, Interception, Gift of the Djinn, Scorched Earth (Goren split), Valley of the Rifts (Goren split), In Defense of Theatre (Goren split), Worst.
Performance. Ever. (Norgu split), The Show Must Go On (Norgu split), Summertime for Bokka (Norgu split), Heart or Mind: Garden in Danger (Koss split), Heart or Mind: Ronjok in Danger (Melonni split)
Back in the Kodash, find Zerai by the fountain again for your next primary. He says that Varesh's mission has weakened the barrier between our world and the Realm of Torment (well duh, we figured
that out when those claws busted through the floor kthx). He wants you to take Koss and Melonni to bring some djinn to some guy. You can also now add Morgahn to your party, your first para
hero (unless you managed to grab Hayda in GW:EN) and is somehow miraculously lv 20 already. We're also gonna go acquire Norgu/Goren now, and finish up some sidequests, cause unlike Morgahn Norgu/Goren
join you at lv 18. Sheesh. Well, this is what we've been saving up all those quests for so hurray for that. Map to Honur Hill and go out into Resplendant Makuun
(*Note: If you're picking Goren as your new teammate and you want to capture the best healing monk elite skill in the game (Healer's Boon), make sure you switch your secondary to
monk and bring a cap sig cause the path for his quest steamrolls right over the boss). Head to Bokka's palace and go
up the first two flights of stairs then go right to find Goren, Norgu, and Zerai. Talk to Zerai who now gives you a choice. As I said before, whichever person you choose for him will NOT be the
person who joins you (so if you want Goren answer Norgu when he asks). They are both lv 18, but Goren is a warrior whose default weapon is a hammer and Norgu is a mesmer. Again, having met them
previously in the MoW/Margrid split does not affect your decision here, and whoever you choose to protect Zerai's girlfriend doesn't affect anything either (i.e., she won't die or whatever if you
pick one or the other). He then tells you to speak to whichever guy you didn't pick for him, so talk to them. Goren starts rambling about how he can't find his stuff, whereas Norgu thinks the
end of the world is an appropriate time to be putting on plays. If you chose Norgu, map to the Kodash and skip to the next paragraph. As for Goren's quest, it begins immediately. He starts
following you around, and if he dies you need to rezone and start over. Go back down the steps and head SW around the palace. After the path opens up head SE. Once you get close enough, Goren
says he'd rather let monsters guard his stuff than the Xunlai Agents. Uh, OK then. Clear out all three groups of harpies around the starburst (if you don't, Goren will just run off on his own
to fight them, which is bad). He then remembers he didn't leave everything in one place. ^=__=^;; Oh yes, cause a magical group of storage vaults in every city that magically gives you access to all your stuff
no matter what city you're in is so much worse than this. Whatever, Goren. ^=__=^;; This time head straight NE (the aforementioned monk boss is just ahead, fyi) past Nuwisha [Collector] to
enter a cavern. There are djinn in here so heads up. Grab the bounty from the Whispers Informant up ahead then take out the two djinn groups around the starburst before Goren banzai's them again.
He starts kneeling around all over the place. When the starburst moves head south to find yourself leaving the cavern (feel free to come back inside after we're done with this quest to take out
the rest of the djinn in the cave for some LB points while we've got this bounty. Don't risk it right now though cause there are some Roaring Ethers and Goren will probably die if you fight them
with him still following you around). Once outside, take the middle path straight south. Once you get rid of the ranger boss mob, make sure you heal up and everyone's energy is regenerated cause
the last spot is up ahead, but is guarded by three mobs that each have a roaring ether in them and Goren will start running towards them as soon as you start moving away from where the boss mob
was. You're going to have to run in and take them all on at once because Goren will not stop for anything. Make sure you target the roaring ethers first, as the rest of the monsters aren't really
an issue. Once they are dead Goren finds his stupid rock and leaves your party. Feel free to backtrack to the cavern now if you want some LB points, then map back to Honur Hill and see Xunlai
Agent Momo for your quest reward, then skip the next paragraph.
OK, Friends of Norgu. Head out the east exit into Vehtendi Valley and make your way through all the blueness, then hang a right at all the pointless named NPCs. Continue south and soon you'll
see the starburst coming up on your right with a bunch of NPCs. Upon your arrival, Norgu claims that acting is the most heroic thing in the multiverse, and then wonders where the rest of his
acting guild members are. He requests that you help him write a new scene since his guildmates are missing (or probably dead). Talk to him to start writing the script. None of your choices
here matter, so make it as serious or piemaster-ridiculous as you'd like. After the nonsense Norgu starts following you around. From here on out you must keep him alive or you'll have to rezone
and start over. Backtrack almost all the way back to the mess of blue, turn right at the same mob of pointless named NPCs, and murder all the heket at the bottom of the stairs. I guess they...
ate Norgu's guildmates? After the fight, Norgu says that he'll join your party if you do one more thing to him: apparently copyrighting the story of your fight against Abaddon so he can profit off
of it after the world ends. ^<__<^;; Map back to the Kodash and find Palin near the fountain. Talk to him and Norgu joins your party~
Put your new friend into your party and map to the Chantry of Secrets.
Talk to Whispers Acolyte down by the statue of Grenth. Uh. Apparently Abaddon was behind the whole titans thing in Prophecies? So now I have someone to blame for those obnoxious titan quests in
post-game Prophecies. >:( Anyway. Mr. Acolyte Guy wants us to go make sure this titan prisoner of theirs is still locked up in his tomb. Well, this tomb is back in Kourna, so map to the SS
Sanctuary and head out into Jahai Bluffs via the Command Post. This tomb is that giant stone head you went to when you met MoW and Margrid for the first time, so basically a short jog just NE of
the portal you just went through. Before you even get all that close, the quest updates, so when it does just map back to the Sanctuary. Well that was an easy quest. ^=__=^;; Well, we're not
quite done with Kourna yet. Alright, here's the deal guys. Mirza (yeah, the centaur guy from waaaaaaay back when) has new quests for you now that we did the Grand Court of Keyboard Smash mish.
You'll want an mm or a spirit spammer (or both, or several!) for the second quest Mirza gives you. Also make sure you've got your LB title active and take LB Gaze with you. These two new quests require you to
have completed his earlier quest chain, so if you've not done that go
here
to the section after the Pogahn Passage mission to get them done. His quests also give LB points which is always a good thing, cause who doesn't want increased dmg vs and decreased dmg from demons
anyway? Head out into Turai's Procession via the Command Post and head north. When the path splits go left then right. When the path splits again head straight NE to find Mirza. He says that
Nightfall has corrupted the Ancestor Tree and wants you to destroy the demons coming from the corrupted tree. The first location is just west of Mirza. You actually don't need the roots he drops
at your feet so just leave them there. Once you approach the first location a mob spawns just to the right of the starburst. There are going to be many mobs, however the next mob will not spawn
until the previous one is completely defeated, and they often spawn out of aggro range, so you get time to regen energy and heal up if you need to. Once all the mobs are dead return to Mirza.
He thanks you for fixing the tree, but that there's no time to celebrate. Speak to him again for a Master level quest. He informs you that an army of demons is headed this way, then starts running
off. Don't worry, Mirza can die without it being quest failed. In fact, you'll probably die several times during this quest. Just run back from the res shrine whenever you do. There are actually
several waves of multiple mobs and they tend to just all come at you at once and the NPCs don't last very long so just have patience. There are like four waves, and when the wave with the boss
shows up that's the last one. If Mirza does in fact die (which he probably will), once the quest updates telling you to speak to him for your reward rezone and make your way back to his usual
spot to get your quest reward. He's actually got one more quest for you but he won't offer it until after a later mission (what is your deal, Mirzaaaaaa?), so yeah, we'll be back here again later.
But for now we are done with him, so map to the Chantry.
Talk to Mr. Acolyte twice so you can accept your quest reward. He's also got a new quest for you, a Master level quest. Grab it, then talk to Mr. Adept right next to Mr. Acolyte. He tells you that the titan has
escaped back to the Realm of Torment, but now the Margos have decided to slaughter random villagers in revenge for the imprisonment of the titan. Cause nothing says revenge like killing random
nobodies amirite. ^<__<^;; Go out into Yatendi Canyons and go into the water and turn right. Cross the bridge up ahead going west. Head straight across this area through the giant blue gate
on the other side. Quickly run through to activate the shrine and grab the bounty from the Whispers guy, then run back to the gate and make your stand here. It may be a "Master" quest but this
thing is like 50 times easier than the one Mirza had for you. You really only get two small groups at a time, staggered, and the next wave won't show up until the previous wave of two groups is
dead. After a decently short amount of time the waves are gone, so map back to the Chantry and hand in your quest to Mr. Adept. Alright guys, now that we're starting to see a lot more demons,
and since we've finished the Grand Court mission, there's now an area where you can farm LB points relatively easily if you want to up your LB rank before moving on. Trust me you are going to
want to get to at least r4 ASAP. I won't make you do this but I am recommending that you do so. Also, you don't need to do it right this minute; this just seems like the most
convenient place to mention it. If you're gonna do it just make sure you get it done before clicking on the link for the next page. If you're not interested, skip to the next paragraph. For the rest of you, map to
Tihark Orchard, go out the west exit, and go through the portal that's like two feet away. If you'd tried to come here before they wouldn't let you in without bringing Tahlkora with you, but now
that Nightfall has started, you can go in whenever you want with whomever you want. There's a Whispers Informant a very short way away so grab the bounty from him then go nuts and murder whatever
you want. Have fun~ Oh, also oddly enough Margos and titans don't count for this bounty. There are other bounty givers out here though so just keep an eye out.
Map to Dzagonur, go out into the Mirror of Lyss, and speak to Sergeant Bokkun just outside the gate. He says he's totally willing to bust some heket heads, so re-enter Dzagonur and give Tanmod
the good news. He doesn't seem to think that the heket are much of a problem though. He's got a new quest for you which involves you acquiring info on this so-called heket threat. Head back
out and talk to Bokkun again. The scout chick right next to him decides to go with you. Head directly west into the caves and stop as soon as the starburst enters your aggro bubble. Two heket
up ahead soon begin to have a conversation about a "human warmarshal" that's helping them. Just stand by and listen in, then go straight south and stop just within range of the starburst again.
These two heket confirm that it is, in fact, Varesh who is helping them. Map back to Dzagonur and give your report to Tanmod. Now he wants you to stop that shipment coming in and sends you off
with the scout chick again. She's right where she was two seconds ago, so back outside we go. Talk to her, then head straight south again to about where the second group of heket were for the
last quest. There are three mobs of Kournans but don't worry about this "intercept the shipment aaahhh!" nonsense; they stop moving near the starburst so take out each mob one at a time and
you'll be fine. Once they're all dead, map back to Dzagonur and report to Tanmod again. Alright, now map to Mihanu Township. You can only get this next quest if you've done the Dasha Vestibule
mission, but it gives two trade contracts so you might want to do the mission with a friend who's got Margrid so you can get this quest. At this point in the game all you need to do in order to
get inside the actual outpost (if you chose MoW instead) is go straight NW from Honur Hill to the res shrine (the one NW of there, not the one right outside Honur Hill). As soon as you get close
enough to the shrine a ray of light comes out of the mountain to the right of the shrine, the rocks fall away, and a portal is revealed. Go through it to enter Dasha Vestibule~ Again, you need
Margrid in your party for this mission, so either go with a friend or borrow Margrid from one (and by "borrow" I mean add your friend and just his Margrid to your party then he can just map out
once you start the mission and his Margrid will stay with you). Anyway, once you've gotten that done (mission info is on the previous page), come back to Mihanu and talk to Library Envoy Chukeht,
who's by the henches. He wants you to find some Gift of the Djinn treasure thing inside Ahdashim. This mission is a major pain in the arse so we'll get back to it later. ^<__<^;; Map to Tihark
and go out into the Forum Highlands via the west exit. Go SW to find a whole mess of harpies. Use your l337 pulling skillz and get rid of them. Somewhere in that mess is the boss Kamveh wants
you to murder. The heket boss he wants dead is just a short straight shot north of the harpy boss. Use your mad pulling skillz again and thin out the heket before taking out the boss. Once
both the harpy boss and the heket boss are dead head east towards the Kodash to find Kamveh and get your quest reward. Well, your new friend should be lv 20 by now, but we've got more stuff to
do that requires their existence so let's get going.
Map to Honur Hill with your new friend in tow and go to Bokka's palace in Resplendant Makuun. Make your way through the insane twists and turns inside the palace til you find Bokka. We're gonna
hit up Goren's quests first so if you chose Norgu, skip to the next paragraph (Bokka is the quest-giver for both dudes. Also, we'll need Yahnur Market on our map later so you'll want to follow
the Goren people til we reach the city). He tells you that some farmer needs some assistance with something. Vagueness,
thy name is Bokka. Leave the palace (what should we do with a drunken architect~~) and follow the path west then south. When the path turns east you'll soon come across a fork in the road
(who left this here??). Take the south path and go straight. You'll soon find a portal to Yahnur Market, which you should go through. There are actually two exits to Vehtendi Valley. You want
the southern exit. Follow the path up some steps that exist for no reason (maybe the drunken architect practised out here?) and if you keep following the wall on your left you'll quickly find
Diji the farmer dude. Uh... well, maybe this is why Bokka's instructions were so vague. This guy seems like he's two sandwiches short of a picnic. After he's done blabbering, head west a short
ways to find some Margos. This is a pretty small group so just murder them, then return to Not-A-Picnic Guy, who sends you back to Bokka. Well, at least he thanked us. I don't think any other
quest-giver ever has. ^@__@^;; So go report back to Bokka, who gives you your reward and then tells you to "come back later," where "later" is apparently right now cause he's got his next quest
ready for you. You might want to bring LB Gaze this time if you didn't last time, just to make things go faster. Map back to Yahnur and return to where Diji was to find the first group of Margos.
Next, go to where the Margos were in the last quest. Cross the bridge NW of there, then the next bridge just west of there. The next Margo group is just ahead. After they're dead, follow the
southern wall going east to find the last Margo mob by a mountain. Once they are dead, go report to Bokka. Now, map to Honur Hill and speak to Royal Finance Minister Oluda at the west end of town.
He's got a Masters quest for you involving saving Bokka from an invading demon army (and yes, Goren is required for this. Lame-o). Return to the palace and park yourselves at the top of the
stairs that the starburst is at the base of. As you approach the starburst Margos start spawning outside. They will be distracted by the NPCs on the way into the palace so you have some time to
drop spirits or traps or whatever you want to do. The game won't tell you how many waves there are left, but as long as you stay at the top of the stairs you should be fine. Sure, the sides of
the stairs block line-of-sight attacks but the Margos have a lot of of rangers with them so it also works in your benefit. Keep your eye out for any Sorcerers so you can take them out quickly.
Once you notice that the Margos are running out of reinforcements feel free to move to the bottom of the stairs and finish them off. When they are all dead, return to Bokka for your reward. Seems
he's become a fan of ours. Yay? We're done with Goren for now, so skip down to the Kodash section.
Friends of Norgu! Prince Bokka has a quest for you involving staying away from his buffet! And also to figure out how and/or why he was almost murdered in his own palace. Backtrack a bit to find
Theatre Manager Daudi, who starts flipping out as soon as you approach. Uh. I guess that's the entire quest? Go tell Bokka what you know, which is, well, not much. You'll have to talk to him
twice to get the reward though. He now has a new quest for you. He wants a new play and since he can't be arsed to walk two feet he wants you to tell Daudi to make him a new play. Daudi promptly
freaks out again and sends you off to find some writers. *sigh* Goren's friends get to fight demons and we get to exercise our non-existant people skills. Lame-o. Map to Honur Hill and find
Kenyatta by the henchies. He claims he's a waste of space, and then demands you go save his friend Sijo from his own idiocy. *sigh* Go back out into Resplendant Makuun and go left. You'll soon
enter some caves full of djinn and Roaring Ethers. Take a left at the Whispers Informant, continue SE past the waterfall, then take the NE path when you see another Whispers guy up ahead. A short
way down the path you'll find Sijo, or at least what remains of him. Stagnant, indeed. Can't be very dynamic when you're dead. ^<__<^;; Inspect his body and you'll find a script in his pockets,
so at least this wasn't a total wash. Report back to Neurotic Daudi, who decides to change the play to Summertime for Bokka. Eh, Bokka's a narcissist, I'm sure it'll be fine. Of course, Daudi
continues to flip out and now wants you to find him some actors for his rubbish play. Map to the Grand Court and go out the east exit then head south. Ola is only a short distance away, but is
going to take some convincing. Go ahead and call him old, then continue to insult him and eventually he'll decide to play the lead role. Amadi, however, seems to have gotten herself captured and
this douche can't be arsed to save his "beloved," so off we go. Map to Yahnur Market (if you didn't follow the Goren guys to this town you'll have to take the long way) and go out into Makuun
and go straight east. Very quickly you'll come across the Kournans that have Amadi. They don't even have Margos with them, so just steamroll over them and then talk to Amadi. Since you did save
her life, and she's apparently in love with Norgu, she decides to be in the play. Go tell Daudi the good news (the quest won't reset if you map to Honur Hill first). Ah Daudi, you crazy panicking
bastard, never change.
OK now that we're all back together map to the Kodash and put Koss and Melonhead into your party. It's primary time~ Make sure you've got your LB title active and LB Gaze in your bar, then go
out into the Forum Highlands. Go right up a ramp and down some stairs and left down some more stairs to find yourself near the Font of Lyss. Butoh the Bold is right by the font so go talk to him
(and yeah, there are random non-hostile djinn floating about, don't worry they are here to help). Once you talk to him, Margos start showing up. Stay in the area of the font and don't go further
away from it than the magic carpet-bridges so you don't leave the font unprotected. They will eventually start showing up on both sides of the font (SE and NW), including just spawning out of
nowhere, so just stay put and it'll be just fine~
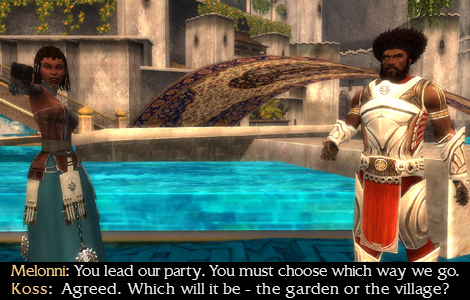
*sigh* Can't these two agree on anything? Well, you know what this means. Yep. We're splitting the party. AGAIN. ^=__=^;; Talk to Butoh, then map back to the Kodash and talk to Zerai for your
quest reward. OK, so here's the deal guys. You can actually take both quests now, BUT you only need to do one of the next missions (Jennur's Horde for Koss, Nundu Bay for Melonni) to continue
the storyline. So yeah, as usual I'm writing up stuff for both but do only one or do both, it's up to you. Obviously since this is a "split" Koss is a required hero for Jennur's and Melonni is
a required hero for Nundu, so you might want to pick which one you do based on which of those two heroes you've got better skills for. I will tell you that Jennur's Horde is an absolute pain in
the friggin arse and if given the choice I always pick Nundu but that's just my opinion. Oh and one more thing: despite their bitching, your choice here doesn't actually affect the storyline at
all, so you don't have to worry about repaying your debt to Ronjok for hiding you from the Kournans vs the tactical benefit of helping the princes that you need as your allies. Just like when
choosing whether to save Kormir or not it all works itself out in the end~ (speaking of Kormir, the hell has she been doing this entire time??)
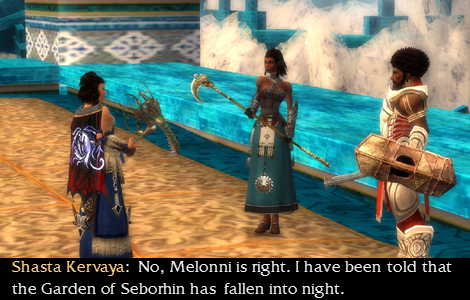
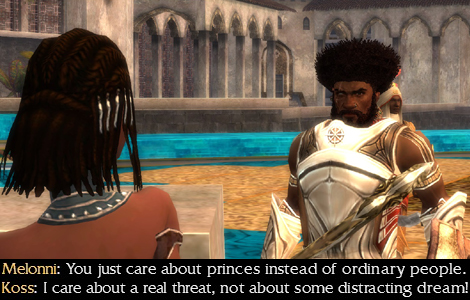
Heart or Mind
Corsair Infestation
Those Bird-Things Aren't the Only Harpies Around Here
It's Getting Kinda Crowded In Here
And Then the Men Go Marching Out Into the Fray...
Boldly Going to Strange New Lands
On the Run
Me and What Army? CENTAUR ARMY, THAT'S WHAT
Between a Rocky Demon and a Hard Fort
Invasion of the Party Crashers
Stop Splitting the Party