
Quests: Final Blow (primary)
This is where you end up after the ending cinematic of Thunderhead Keep. Also, doing Thunderhead Keep is the ONLY way to get to this outpost, so if you're
reading this page wondering how to get here without doing missions, sorry-dorry, but this is a friggin island. So unless you find a runner that's somehow
learned to fly... (and no, those Aion wing emote doesn't count :op ) Talk to Shadow (she's on the opposite side of the area from the henches and the portal
that leads outside) for your very last primary quest in Prophecies. Also, the skill trainer in this town sells EVERY. SINGLE. SKILL. in Prophecies. For
every profession. Well, every non-elite skill anyway. So if there's a skill you've been meaning to buy but couldn't be bothered getting to the town that
sells it cause it was obnoxiously out of the way, the game has made it very convenient for you.
Alright, so, the explorable area right outside? Has sixteen elite skills to cap. SIXTEEN. Of course, since Prophecies bosses don't have fixed locations,
you're not going to find all 16 in one go (besides the fact that you can only have two professions on your char at once anyway). But the enemies out there
are evil. Well, actually, only the Mahgo Hydra and the Drakes are evil, but they are very very evil and I really suggest you avoid either of those types
of enemies as much as possible. Unfortunately, we have to get through at least one mob of hydra to get to our goal for the primary, so you are going to
learn to hate the Mahgo Hydra as much as I do, whether you want to mee them or not.
Grab a party, henchmen or otherwise, and head outside. Oh, and if you're henching this, do not take Cynn. She's fire, has always been fire, and always
will be fire, and if you haven't noticed yet, this is an island of volcanoes. Fire vs fire doesn't work as well as the Romans would have you think. Once
you load, head directly left and watch the patrol patterns. You want to head north along the left path, but wait for a group of hydra to come down that
path and then back again. If you see any Flesh Golems, go ahead and have someone pull that mob to where your party is waiting so you can get them out of
the way. Do this for both mobs of Flesh Golems (this will also gain you some valuable minions if you've got an mm in the party), then wait for the hydra
group to come back down and back. Follow them back up the path (yes, there are two hydra mobs, one does not go back up the path) while keeping out of aggro
range, then head left as soon as possible and stop on the plateau up here. Look northwest and hold down the left Ctrl key and you'll see something called
an Ether Seal. You're gonna really hate these things in the next mission, but for now just head straight for it and destroy it. No, seriously, as soon
as you see it, head that way cause the plateau is where a lot of hydra mobs tend to stop, and you really don't want them on you. Once the Ether Seal is
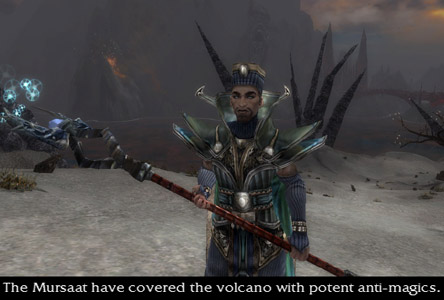
destroyed, head directly northwest (yes, there are two paths with White Mantle and Mursaat on them, you want the one on the right) and follow the path north.
The second mob of White Mantle are usually really close to a mob of drakes. Remember what I said about avoiding these things? Yeah. Pull the White Mantle
away from the drakes and kill the White Mantle (of course, if you've got minions, sometimes this is a bit difficult, but at least minions are good cannon
fodder). Turn left, then just head straight west (make sure you take out the two patrolling Breeze Keeper groups along the way so you don't get caught
between them and something else). Just a bit further west is your quest objective. Take out all of the random mobs of stuff around the bosses before you
aggro the bosses. The bosses are two mesmers and a warrior, so not too much to worry about. Don't bother trying to pull one boss at a time since it's
virtually impossible. After they are dead, DO NOT map back to Ember Light Camp, otherwise you'll have to do this all over again. ^-__-^;; Just to the
west of where the bosses were waiting is an NPC named Captain Grumby. Talk to him. Seems he's been working for the Mantle, but now decides not to anymore,
since you killed them off so easily. Considering his response to you asking for him to take you to the Ring of Fire, he's really just a coward. And also
really flaky. After some whining, he finally takes you where you need to go. Speak to the random dwarf in the outpost to get your quest reward.


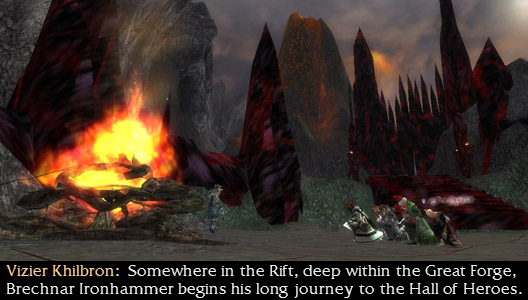
Mission map. About as soon as you spawn, Brechnar decides he's a kamikaze and runs right into a mob of Mursaat. Of course, he's
not infused, so he dies pretty quickly, so don't stand there gawking. The purpose of him doing this is to provide a distraction for you, so don't
move until he's pulled the huge mob away from you. Once he's done that, run right until the path veers left, and stop there. Two groups of Mursaat start
heading around the lava pit in your direction, although you should be able to kill off the first group before the second one arrives. Continue northwest
then north, taking out the Mursaat mobs along the way. Once you reach the top of the hill, stop there and have someone with a bow pull the Jades towards
your party, away from that tower thing called Ether Seal. See, if you get close enough to Ether Seals, they drain all of your energy (and cause damage),
which is bad. There will be more of them further on. Of course, if you've got minions, they might just aggro everything and keep them down below, but
whatever. After the Jades are gone, destroy the Ether Seal and continue north along the path (AVOID THE DRAKES ON THE RIGHT). Be aware that Nightmares
will pop up along this path at some point. Continue straight forward and take out any ettins you encounter. There are three mobs, one of which may have run
off somewhere and will show up at some point and has a boss in it. You need to kill this mob, so if they're not around when you arrive, wait for them.
Continue north, then take the first right you find, which takes you up a stone bridge formation thing. There's another boss around here, and the Ancient
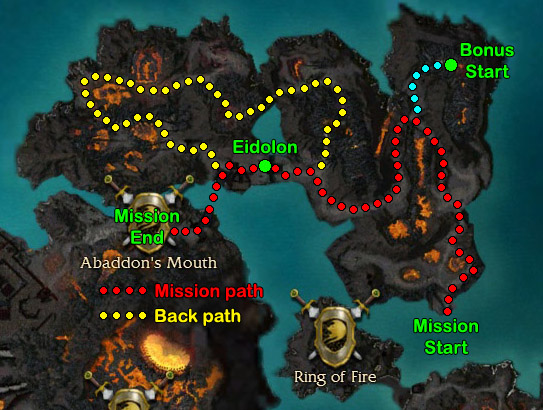
Seer. Make sure you take out both ettin mobs on either side of her cause you need her to stay alive if you're gonna do the bonus. Talk to her once both
mobs are dead to get the bonus objective. By the way, there are two paths that you can take to do this mission, with or without the bonus, but almost everyone
finds that the path you have to take when you're doing the bonus is a lot easier, so whether you're doing the bonus or not, I'm going to write this mission
walkthrough using the bonus path. It'll still get you to the end of the mission, but I find it a lot easier. However, if you really don't want to bother,
click on the mission map and take the path with the yellow dots marked Back Path.
Return to where you fought the first ettin boss and take the right path that heads south. You'll soon find a big pool of lava in your way. Have someone
pull the ettin mob on the other side across the lava pool. And yeah, it's a bit hard to pull these guys, but trust me, it's possible. You just have to
keep them inside your aggro bubble as you're pulling them across. Make sure your healers know to keep the guy who's pulling healed, since the lava sets
you on fire, causing degen. Once the mob is dead, cross the lava pool and heal up. When you arrive, a group of Mursaat (including a boss and an Ether Seal)
are probably fighting some ettin. Let them kill eachother off, then pull whoever's still alive away from the Ether Seal. Sometimes there's anotehr mob of
ettin a bit further past the ones you pulled. Kill them too. :op Destroy the Ether Seal, then continue south then west to trigger a cinematic.
Again, I don't really care what Khilbron has to say. The other way he's talking about is super-hard, and only useful if you want to cap the skills the
bosses back there have. I've only ever successfully completed the mission twice going by the back path, and that was with a bunch of party members dying.
There are evil things back there, but hey whatevs, it's up to you. But like I said, I'm gonna write this using the bonus path, which will still get you
to the end of the mission. Moving on!
Follow the path until you come to an area with lots of paths going off in random directions. Stay at the crossroads for a bit and kill off any patrols of
breeze keepers that show up (should be 2-3). Now, the non-bonus path goes off to the north, so if you're doing that, head that way, check the mission map
I've provided, and good luck to you. You'll need it. The rest of us are going west. Stop just a bit west of where the path goes past two small hills on
either side and park your party here. Have someone pull one group of Mursaat to your party, away from the two Ether Seals, kill them, then do the same with
the second mob of Mursaat there. Now, go all the way to the left side of this area and attack the Ether Seal there. This way you're only in range of one
Ether Seal while attacking. Once this one is destroyed, head across to the other one and destroy it (please note that there are two more seals guarding the
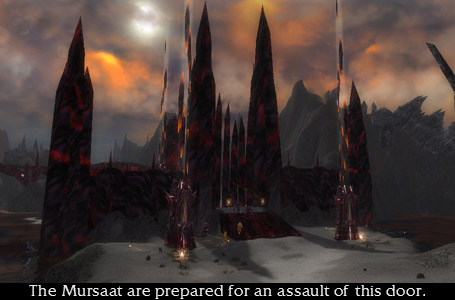
gate to the west, so stay out of range of those). Once the second outside Ether Seal is destroyed, regen and then attack the doors. But be ready to run
east once the gate Seals are destroyed, cause the door will open and cause some of the Mursaat inside to head towards it. If you run back east a bit (where
the two outside Seals were) you won't aggro them. They won't always move, but if they do it's better to be prepared for it.
There are two more Seals inside the fort you just broke into. The top of the stairs (and I mean right at the edge of the topmost step) is the closest you
can get while still being outside the range of the Seals, so park everyone there and have someone pull the wandering Mursaat mob or the wandering boss
towards your party when they're near enough to be pulled. Once the mobs are dead, go inside and right, then west along the wall until you're right out of
range of the Seal. Make sure you're right against the wall so you're less likely to aggro anything. Regen for a bit, but watch out for the small group
headed your way. Regen again after they're dead, then take out the northmost Seal. Regen if you need to, then go east a bit and destroy the southern Seal.
Please be aware that once this second Seal is destroyed, the Eidolon for the bonus will spawn. He's a water ele, who dies pretty quickly, but it's still
better to know ahead of time that he's spawning than suddenly realising something is taking whacks at your party that wasn't there before. Also, his spawn
point is directly between the two towers the Seals were on. Once he's dead he drops a Spectral Essence. If you're doing the bonus, go ahead and take it
back to the Seer. Only one person needs to take it back but at least have a healer run back with them at least to the lava pool and stay there so they can
heal the guy running the Essence back both times that he has to cross the lava pool. Also, anyone who's in your party that isn't infused for whatever reason
(i.e., ran to Thunderhead Keep and skipped Iron Mines, or got new armour, or whatever) should go with the Essence-runner guy because the Seer will infuse
anyone who isn't infused once she's got the Essence. When your runner gets back, we can continue with the mission.
Face south again and you'll see another Seal. Destroy it to open the gate. There's a boss on the other side, but he's not what's important. What's
important is that large weird round yellow thing on the floor up here. It's a lever which you need to activate to continue. Go back out the gate and head
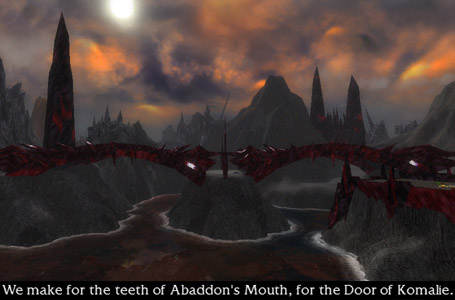
south and pull the non-wandering mob towards you. Kill them, kill the patrol mob, kill the mob a bit further west, then head south across the giant bridge,
destroying any Mursaat in your way. If you didn't activate that lever, you wouldn't be able to get past the end of this bridge. Head right (there's another
lever on this side of the bridge that will close the gate and block off the bridge that you can mess with if you want, but it serves no actual purpose,
mission-wise) to reach a circle (well, it looks like a circle on your radar. You can't tell just by looking at it on the screen). Wait for the patrol mob
that wanders around the circle to reach you and fight them. The boss inside the circle tends to aggro when you aggro the patrol even though he doesn't
patrol with them, but at least if you let the mob come to you, the boss has to find his way out of the circle first, giving you some time to fight the mob
without having to deal with the boss. Of course, if it's the monk boss it can get kinda annoying since he heals the mob whether he's left the circle or not.
Anyway, once the boss is dead the ending cinematic plays. Poor Brechnar. :o(
Still Lava Rivers Run Deep
There's Something Looming on the Horizon
Everything Went [BOOM]
Of Princes and Kings and Banishings
I've Got Snow in My Boots
Corpsicle Alert!
From Snow to Sand in 2.5 Seconds
Of Lions and Lambs
White Mantle, Coast to Coast
In the Jungle, the Deadly Jungle
The Shining Blade's Labyrinth
Fear and Loathing in Maguuma
Ascension Contention
I Don't Think Desert Makes a Very Good Dessert
Do Not Meddle in the Affairs of Dragons, For Thou Art Crunchy And Taste Good With Ketchup
I Never Thought I Would Go Back to the Shiverpeaks. You'd Think I'd Remember to Pack Cold Weather Gear
Infusions and Invasions


