
Quests: To Sorrow's Furnace, Noble Intentions (Oro), Noble Intentions Plan B (Oro)
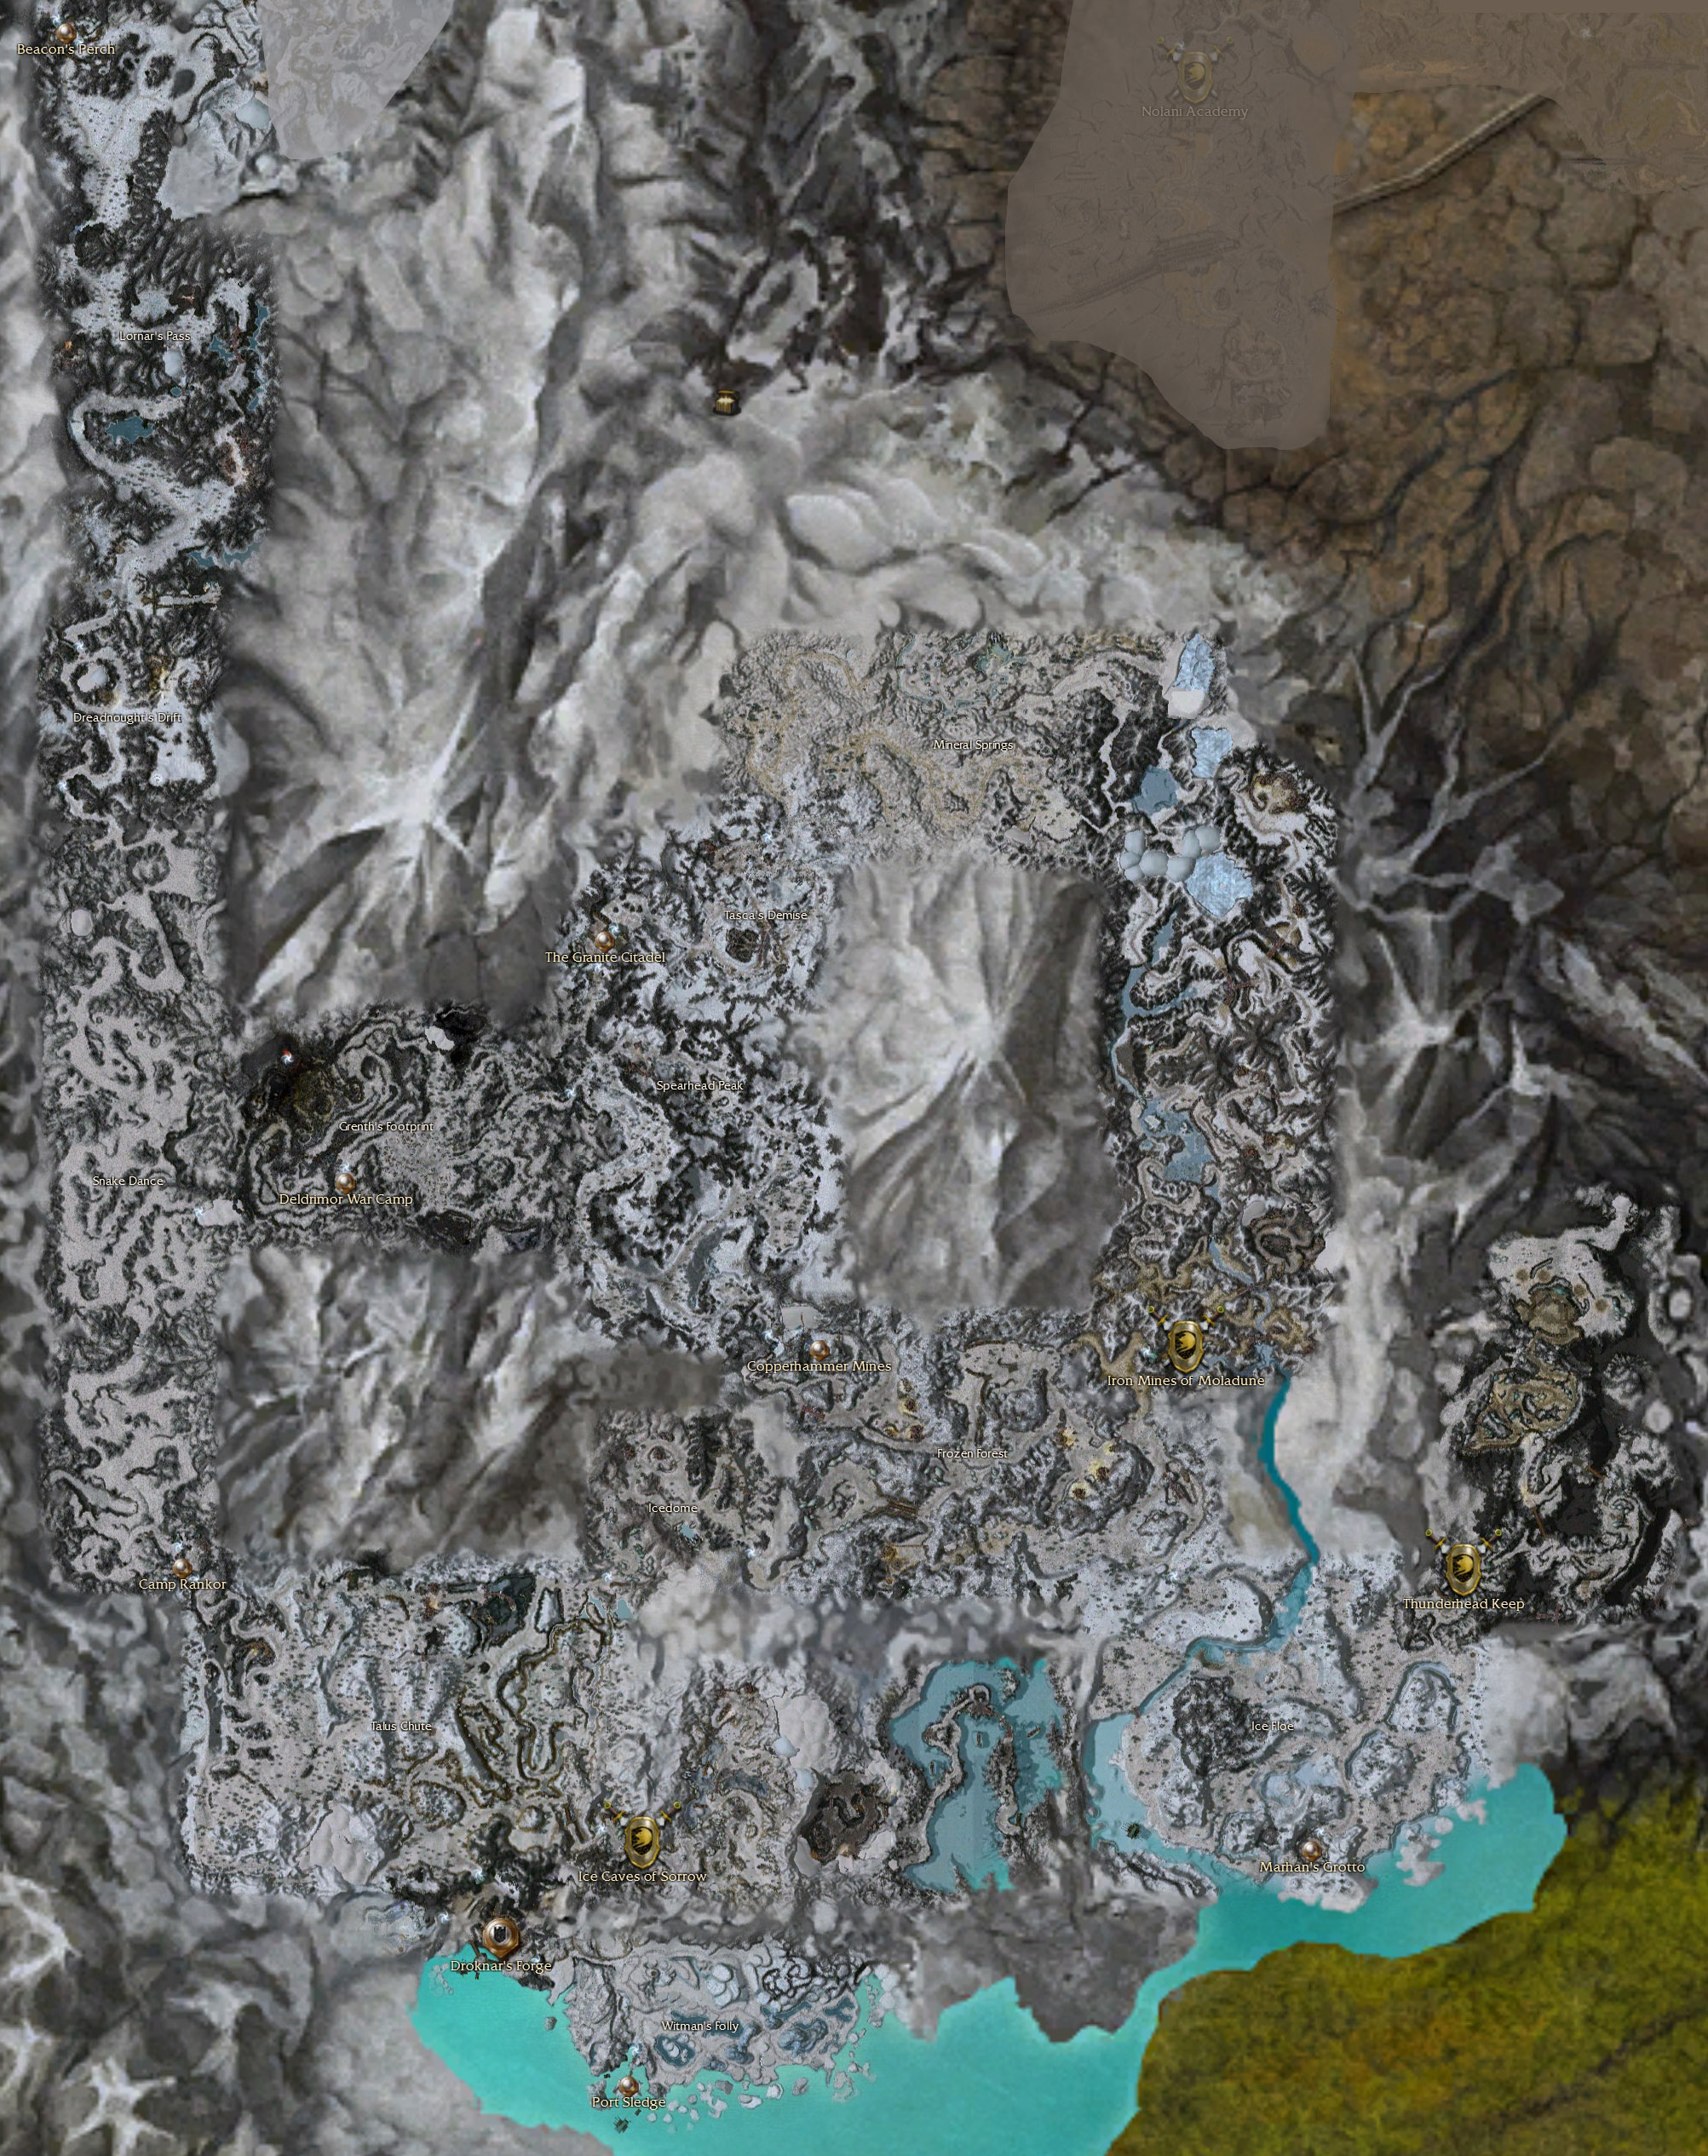
OK guys, if you've been following this walkthrough you should have this map dot by now. If not, use the
Southern Shiverpeaks region map to get there (north
from Camp Rankor, north then east through Snake Dance into Grenth's Footprint. Go through the cave til you get outside, then go right. Follow the path east. Ignore any NPCs you see. Continue
NE through the blackened area, then take a sharp right up the hill to the Deldrimor War Camp). Don't bother picking up any quests along the way; just get to the town first. By the
way,
click here to play the Sorrow's Furnace trailer if you're interested. Anyway, leave town to find a Dwarven Prospector standing in front of you. Talk to him
to get the To Sorrow's Furnace quest (same quest the other Dwarven Prospector you passed when you first entered Grenth's Footprint would've given you). This is an overarching quest with multiple
parts to it. He asks you to help four people in the area out with their various tasks. Ask him where Orozar Highstone is to get his location on your map, since he's the first guy we're gonna
help (just fyi, if people are actually looking for a party to do SF (Sorrow's Furnace stuff) they just call his quests "Oro"). And yes, most of the people you're gonna help have more than one
quest attached to them. Ignore all other NPCs with quests unless I tell you to talk to them. Take the path directly behind the Prospector and head right, then take an immediate left after the
first mob. Remember, Summit Giant Herders have an annoying skill that causes all-party knockdown. Cross the blackened area and take a right once you get into snow again. One thing I'm gonna
mention again since it's relevant here: all of the bosses in Grenth's Footprint and Sorrow's Furnace have a chance to drop green "unique" weapons. This was the first place in all of GuildWars
where greenies came into existance, and even with this in mind some of the greens dropped here are still pretty good. However, the bosses in the boss spawns are random so it makes it kinda annoying
when trying to find a specific boss/weapon. Speaking of which we're about to come up on a boss mob, so take them out.
From the boss mob head directly north to find Oro. Apparently he's some bigshot diplomat for King Jalis and is here because his brother has buggered off to join the Stone Summit. Talk about a
political nightmare. Agree to help him and he starts following you. Head back to where you murdered the boss mob, then make a sharp left. You'll soon come across another boss mob. After they're
dead, head left and continue north into Sorrow's Furnace.
Once inside, go forward and talk to Oro again to learn he's bribed some guards to pretend we're invisible. Oro then takes off running, claiming his bribe must've worked. Well, you'd better keep
up with him cause he's totally wrong, and he's melee so he's liable to get hit pretty often. Once you pass through a gate you reach your first mob of hostiles. After they're dead Oro buggers
off again but don't worry too much about the group coming up cause nothing happens til you get into aggro range, so feel free to pick up your loot and prepare yourselves for the next bit. Once
you get into aggro range, the mob tells Oro that he's been double-crossed and runs off (if you have minions with you, the Priest of Sorrows might get distracted and not trigger the next part of
the quest. If so, move away from Oro so the Priest runs off). Park yourselves a bit SW of the res shrine, with Oro just out of your aggro bubble. This should put you within aggro range of all
three paths the mobs will come down without getting Oro involved in the fighting. Your priority targets are Priests of Sorrows, then Summit Wardens, cause the priests have hard res which is
really annoying, especially when they res a boss, and the wardens are eles with strong earth magic. Once the second boss shows up that should be the end of the mobs. Pick up your loot before
talking to Oro cause he'll just run off again after you get his next quest. Jeeze Oro, stop running around like a suicidal maniac. Look, I don't care about the mob coming up behind you when
Oro goes left at the path split cause Oro sure as hell doesn't. Just keep up with him and take out the enemies he banzais into. The other enemies will probably follow you anyway. Soon afterwards
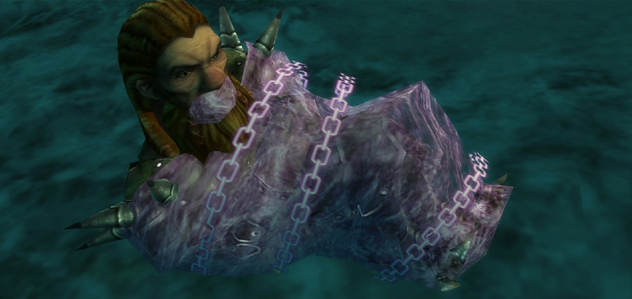
you'll find Ural Highstone, Oro's brother, up ahead. He claims he likes the Stone Summit cause they don't treat him like a child, and refuses to leave with you. Oro somehow casts some weird
kidnapping spell on him even though Oro's a warrior ^O__o^;; Ignore everything Oro says and all the bundles he wants you to carry cause he immediately runs off after the cinematic. Follow him
and take out the mob at the bridge, then go back for Ural-the-bundle. If you have more than yourself as a living breathing player in your party, have someone else activate the nearby Gearbox to
acquire a gear, otherwise take Ural-bundle to his brother, drop him, then go back for the gear. Don't worry, you won't have to deal with any mobs til after you activate the bridge. Activate the
gearbox by the bridge while carrying the gear, then grab Ural-bundle again and run across the bridge. You'll soon see a large mob on a hill on your right. Attack them and go up onto the hill,
making sure Oro follows you, because there's a boss mob headed your way from the northwest and you don't want him to get attacked by them. Plus being on a hill gives you an advantage for when
the boss mob arrives. Afterwards, follow banzai'ing Oro again, and you'll soon come across some rock crushers. Like Oro says, they will literally kill you in one blow, so don't stand under them,
and just hope Oro doesn't run under them himself and impersonate a pancake. After that it's just two or so more mobs til the exit. Talk to Oro for your reward, then map back to the War Camp.
Quests: Summit Slaves (Galen), Gathering Resources, Wrenches in the Gears, Cold One, Fire in the Hole, Unruly Slaves
Back outside talk to the Prospector again and ask him for the locations of the people needing help. Choose Galen Trask and head down to the boss mob near the portal to Sorrow's Furnace (the
second boss mob we fought last time). You'll find Galen Trask just NE of that mob. Seems he's got an infiltration job for you. Lead him into Sorrow's Furnace and talk to him again once inside.
He wants you to scout out several places inside SF while posing as slaves. Galen sells you to the Taskmaster, who informs you that you'll need to learn how to use the gearboxes if you want to
go anywhere down here. Fortunately we learned how to do that in the last quest. Also, this enchantment he puts on you prevents you from attacking the Stone Summit. Fortunately, they'll be non-hostile
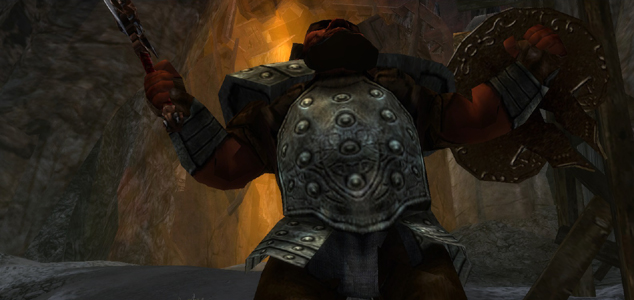
for the duration of Galen's quests. Once Ironboot leads you to Krak Flamewhip, talk to Krak who says you should do what he says or he'll feed you to the moles. He's talking about the dredge,
who are a group of sentient subterranean mole-like creatures that the Summit found and enslaved (you'll see more of them in the Factions campaign and in GW2). Grab all of Krak's quests at once,
then head down to the ground behind Krak and stop at the two Stone Summit having a convo about Runar and Yakslapper fighting eachother. Activate the gear box to the right of these two gossipers
and use it on the gearbox next to the gate just east of you. Go through the now-open gate and talk to Tharn Stonerift. He asks you to find 10 ore ingots. You'll notice some hostiles in this
area. These are rebelling dredge, since people don't usually enjoy being enslaved. You'll find random groups of these guys throughout SF during these quests, fighting against the Stone Summit.
You can help the Summit if you want, cause who doesn't like loot? But for the most part they'll ignore you unless they've already killed all the Summit in the area. Anyway, for right now we
have to kill these guys cause they're between us and the rebel spirit keepers for our Wrenches in the Gears quest. After you kill the ones near Tharn you're going to want to start pulling mobs
so you don't get overwhelmed. Lots of the dredge will patrol around in groups so be careful when pulling. Try not to pull the spirit keepers until everything else is dead. Dredge Shamans are
healers btw, and the spirit keepers have a hard res, so you might end up pulling some anyway. The further away you pull non-spirit keepers the less likely the spirit keepers will get aggro'd.
After you get rid of as many non-spirit keepers as possible, wait until all the corpses of the things you killed disappear, then try to pull the spirit keepers one at a time so they have nothing
to res and don't aggro other spirit keepers, otherwise you might be here awhile unless your damage output is really high. Once they are all dead, loot all the ore boxes in the area (there are
three without opening any gates. Don't worry about opening any gates for now cause we'll totally have 10 by the time we're done with everything). Go back to the res shrine in this area and grab
the Toothed Cog and use it on the gearbox (either one) on the hill behind the shrine. You'll also have "scouted" one of the areas Galen asked you to by merely approaching the shrine.
Return to
Krak to hand in your Wrenches quest then go north and take a right after the two Summit bitching about some Iron Forgeman thing. Once you reach the res shrine you'll start to see some Frost
Golems running towards you. Don't worry, they're not hostile. They will start following you, however. Keep following the path and you'll eventually acquire more frosty followers. When you
reach an open area you might recognise the crushers from Oro's quest earlier. Again, if you get caught under them they will murder your face. Kill all the dredge in the area (your frozen pals
will help) so they're not distracting. If you have a party of heroes/hench, park them somewhere out of the way. Wait til a crusher falls down and then run up to it and wait while touching it.
Once it goes up again go under it to the other side just out of the blast radius and then stop. Your icy friends should stop right in the crusher's path. When it comes down it will kill the
frost golems. Once they turn to Ice, pick up the ice quick before the crusher comes down on top of your head, then double-click the Ice in your inventory and click on the Warm One (like as if
you're using an ID kit on an unID'd item). It takes five Ice to turn a Warm One into a Cold One. Once it's cold, feel free to get rid of any extra ice you have, and go raid the ore boxes in this
area without ending up impersonating a pancake. There's one under each crusher (there are three crushers) and one more further SE by a gear box. Return to Krak and give him his drink.
Return to the two gossiping Summit and grab a gear from the other gearbox near them (not the gearbox you used to open the gate) then go back to where the spirit keepers were. Head right and
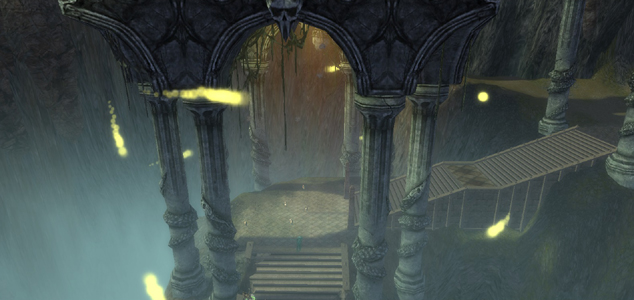
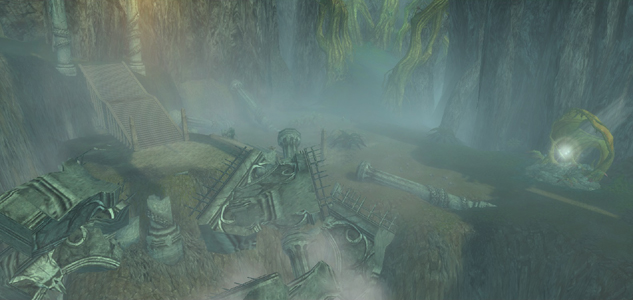
use the gear to open the gate. Grab the ore from the box just on the other side and follow the path to reach some... sort... of weirdo temple. What. Well, go down the stairs to scout another
area for Galen then wander through the grass and dredge and subterranean forest for reasons, then take the first left and climb the hill. Follow the path and you'll eventually find some hostile
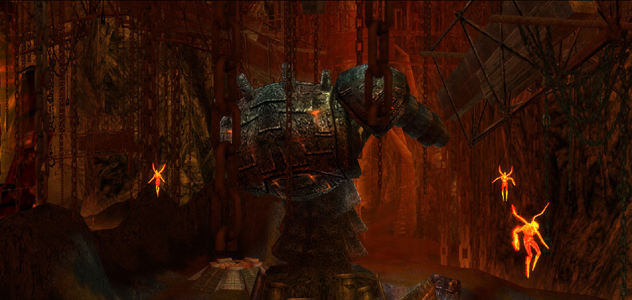
dredge in front of a gate. Kill them, and as you approach the gate you'll see the flame djinn you're supposed to kill a bit further on the other side. Make whatever preparations you need to make
in order to fight this thing (it has pretty powerful fire magic, including a unique monster spell that does 400 dmg split between all of your allies near his target), then grab the gear from the
gearbox here and use it to open the gate. The evil monster skill I just mentioned is called Consuming Flames and if you have any interrupting spells save them for that spell cause ow. Beyond
that spell he's not too bad, so kill him and move on. There's another ore box just to the right of where the djinn was. From the ore box head NE to find more hostile dredge. Either ignore them
or fight them, but the reason we're here is another scouting point. Run up to the Furnace Guardian NPCs to get your fourth scout point, then go left up the hill. On the other side of a stone
bridge are some more crushers and the last ore box you need. Avoid impersonating a pancake and grab the ore, then make your way back to the forest of indeterminate
origin we'd just passed through to get to this area. Head west to take the path deeper into the inexplicable forest, then go south and you'll eventually find a large mob of dredge. Use your
mad pulling skillz to thin them out. Molachev is somewhere in this mess of dredge, so just find and kill him. Also there might be one or two hostile Summit in this area for whatever reason.
Maybe they're conspiring with the dredge? Who knows. This is also the last place you need to scout for Galen (a bit further south from Molachev, so make sure you grab it). Head north back through
the random temple then head up the path straight ahead of you sloping up to return to the area that Tharn is in. Give him the ore, then head back to Krak to hand in your other quests (if you use
minions he probably isn't where you left him last, so use your starburst to find him if he left his hill). Now, head back to the entrance to SF and hand in your scouting quest to Galen, then
map back to the War Camp.
Quests: Kilroy Stonekin
Ask the Prospector where Kilroy Stonekin is. ... oh gods, this guy. So, like, if you've been living under a rock and have never heard of this story, I shall tell you now (and yes, it is relevant).
So, apparently awhile ago in WoW there were a group of dudes going to go do some... I don't know what (I only played WoW for like five days), but apparently it was supposed to be very difficult,
so they were talking on Vent or TS or something about how they were gonna go about doing whatever it was they were doing. Suddenly, over voice chat they randomly hear one of their party members
shouting their character name "LEEROYYYYYY JENKIIIIIIIINS" and just banzai's into a big huge mob and IIRC gets himself and his entire party murdered. SO. Why is a WoW story relevant here? Well.
Kilroy Stonekin here is named after Leeroy Jenkins. Why? CAUSE HE DOES THE SAME EXACT BLOODY THING. I am warning you now because although before you get into SF he behaves like a rational person,
once you get inside he buggers off at full speed. And, unlike Leeroy Jenkins, Kilroy Stonekin is an "essential NPC" so if he gets himself murdered you have to restart this quest. ^=__=^;; So yeah,
just warninya before we even get to the guy. Head to the blackened area before the first boss mob we ever encountered here and instead of going right to the boss mob head straight to find Kilroy
on a little hill. Apparently he wants revenge on some Summit guy for murdering his friends. Well, I'm sure you know your way into SF by now, so head on in. Oh, one thing I will mention,
since you're bound to see Galen Trask on your way there, with an exclamation mark over his head, all of these quests are repeatable but you only need to do them once for the overall To Sorrow's
Furnace quest. Anyway, like I said before, pretty much as soon as you get inside SF Kilroy buggers off. Do not worry about your drops for this quest cause you can just go back and grab them
after Kilroy gets his vengeance, unless you're worried about the time limit after which loot isn't assigned to a specific party member anymore and you get something really nice, I don't know.
But this quest is really quick so don't worry too much about it either way. Keeping Kilroy alive is more important, since he has zero sense in that thick skull of his. And yeah, the reason I
left this quest off til now is cause, in case you hadn't noticed from all my bitching about Rurik, I don't like essential NPC's that enjoy banzai'ing off and getting themselves murdered. ^=__=^;;
So the holding off wasn't cause it's hard but cause it's annoying. So once inside just stick to him like glue wherever he goes. Something that comes in handy is autofollow (in case you somehow
made it this far in the game without knowing how it works, click on his name in your party list and just hit spacebar to follow him. You'll have to keep hitting spacebar every time he stops though
cause that ends the autofollow). He does however give you a nice buff (50% faster skill recharge, 50% less energy cost for spells, and, more importantly, 50% faster movement speed), but this shout
of his has a very limited range so if you aren't like right next to him when he uses it you won't get it, which is bad. At some point very soon after he starts buggering off you'll end up in
the crusher section from the past two quests, so be aware and don't end up impersonating a pancake plzkthx. Once you cross a long bridge, keep your eyes peeled for a named dredge NPC named Molenin.
Basically the last mob after this NPC means you're very close to the end. After the mob after Molenin you'll soon see a very narrow gate up ahead. Prepare yourself, cause this part is where
Kilroy does his best Leeroy Jenkins impersonation: Yeah, he runs into the first mob very quickly, HOWEVER keep following him cause he will break aggro very quickly and move on to the next group,
break aggro again within like 2sec, and then banzai straight for Gulnar (the monk boss he's here to kill). And yes, I mean he doesn't wait til the other two mobs are dead first. So just make sure
your entire party knows he's going to do this and just follow him to the monk boss. Take out the Furnace Guardian in his mob first, then deal with all the other rubbish Kilroy's aggro'd. After
everything is dead, Kilroy sort of starts and stops but he does eventually stop moving on an upward-sloping path, so talk to him for your reward, and don't forget to loot the unlocked chest near
the res shrine, which usually doesn't actually have anything in it, especially if your party is full of heroes/hench. After that, feel free to use your minimap to backtrack through the area and
pick up any loot you left behind, then map back to the War Camp (btw, there's another unlocked chest on the large hill we fought on earlier, and by the crushers).
Quests: Subversive Ideas, Political Ramifications, Tasca's Reprise
So I know we've only got one more guy in our To Sorrow's Furnace list, but everything else we've done so far in SF is cake compared to that. Plus, there are a few other quests we can get out of
the way before that that also have to do with SF, so here we go. Also, one of these quests gives you ample opportunity for a greenie drop, and who doesn't like loot? Ignore the Prospector this
time, and just head directly into SF without talking to anyone. Pretty much everything is going to be hostile from here on in, just fyi. This includes Summit AND the Dredge.
Follow the path til you see the res shrine on the right side of the path. To the right of that is a closed gate that we need to open. Head east and use your pulling skills to slowly and
methodically clear this area of all mobs. Remember, Summit Wardens are eles so take them out first unless there are Priests in the enemy mobs. Knights are warriors, Surveyors are rangers, Dark
Binders are necros, and Taskmasters are mesmers. For the Dredge teams, Brutes are wars, Scouts are rangers, and Shamans/Spirit Keepers are monks.
There's a non-hostile Dredge Slave on a hill where Krak was during Galen's quest. He's going to be a signpost now~ To the right of him are two gearboxes
that aren't associated with a gate (i.e., to the right of the gate down here). This didn't matter earlier since we weren't doing much with the gates, but any gearbox that has a yellow light on
it has a gear in it. If there is no light there is no gear in it. Both of these have lights so grab one (doesn't matter which) and head back to the gate I said we need to open (by the res shrine). Put
the gear in the gearbox to open the gate and head on through. There are a bunch of mobs up ahead, so pull again and take them all out. Open the unlocked chest in this area to acquire Tasca's
Axe, which we'll need for one of the quests we're about to do so grab it. Go east down a path to find yourself back in the area with the random temple next to the forest of indeterminate origin.
Continue down the path, but be careful. There's a boss on the platform that you can see from the top of the path (the platform is part of the temple), and one down below, so try not to aggro
everything although the platform boss will probably aggro with the first group you encounter on the lower half of this path. Be mindful of patrols coming in from your left when you reach the
bottom of the path. Once you've taken care of everything that might kill you, go into the temple and down to the random forest. Kill off the second boss and his mob, then talk to Molachev, who
apparently got better after we murdered him for Krak. Talk to him to get the Subversive Ideas quest. There's a Dredge Slave right by the res shrine down here, so give him one of Molachev's scrolls.
Continue through the inexplicable forest and head west when the path splits, then SW. When the path opens up again there's a Dredge Slave on your right and on your left. There's also a ton of
enemies here, so pick which way you want to go first and have at it. Give scrolls to both slaves, then continue south. You'll soon find yourself where we found Molachev when we were sent to
kill him before. Further south is a sort of fountain within another temple-type place. Open the unlocked chest for Tasca's Compass and give a scroll to another slave just a bit south of the
fountain-temple. Head east next to eventually find another slave and another unlocked chest (just north of the slave), which contains Tasca's Boots. Continue SE over a tree-bridge and kill the
boss up ahead (everyone else is irrelevant), then return to Molachev at the original temple and hand in your quest. Go back up the temple stairs and return to our Dredge signpost from earlier
(back near the beginning). Grab the gear you didn't grab before (to the right of the signpost-dredge) and open the gate right next to it. Somewhere in this mess further ahead is another boss
and our old friend Tharn Stonerift. He's got a quest for us, involving killing all the Summit bosses around here. Fortunately, we've killed four so far so we're almost done. Woo~ AND there's
another one just ahead, on the other side of the res shrine. By the way, there are more bosses than just six in here right now, and since I like loot we're gonna be hitting all of them :op
First, grab the gear to the right of the res shrine and open the gate on the left side of this area. Take a right when the path splits, and you'll soon encounter a large open area (where the
fire ele was before). There are two bosses here and lots of monks, so you need to pull carefully here. If you have minions, you'll want to park your party outside of the open area cause there
are some enemies on a hill literally above your head and the minions will bugger off after them and aggro a ton of other stuff in the process. Once the two bosses are dead your quest for Tharn
is technically complete but we've got other stuff to do regardless (and more bosses means more chances for greenies). Speaking of the hill above your head, there's another unlocked chest on it
(near the furnace guardians, whom you should really try to avoid aggroing) that contains Tasca's Map. Return to Tharn and hand in your quest, then return to our signpost-dredge. North of him
is another path that passes another res shrine. Follow it to eventually find yourself back in your friendly neighbourhood crusher zone. There's another boss by the crushers (so be careful where
you stand while fighting). After he's dead, continue SE down the path. There's a boss patrol coming in from the left where the path splits. Continue down that left path to find Marshall Whitman,
who has another quest for you. He seems to think Marshall Tasca (brother from another mother?) is still alive. You know, the guy the explorable area Tasca's Demise is named after? We went there
for one of the titan quests. PRETTY SURE THAT MEANS HE'S DEAD, MR. GUY. Well whatever, we're almost done with this quest too :op Go back up the path you came from a bit, grab the gear from the
gearbox, then go back to the path split and take the other path this time. There's another boss just up ahead, in the giant mob on the hill. You might want to bypass this group but be aware
there's a patrol coming in from the SE. Up to you though. I like loot, so I'm just gonna murder everything. :op Plus, it's kinda hard to ninja by a giant mob while carrying a gear that makes
you go super-slow. Continue down the path and use the gear on the gearbox to lower the bridge. Aight, now you have a choice to make. The last chest you need for your quest is right at the other
end of the bridge. However, there are two more bosses (the last two still alive in SF) not too far from our current position. If you don't want loot, just grab Tasca's Pack from the unlocked
chest, give all the items to Marshall, then map back to the War Camp. All you loot fiends, FOLLOW ME! Continue forward after grabbing the Pack from the chest, then head right. Take another right
when the path splits. When it splits again head straight south into a giant mob of doom in which the two bosses are. Although you really shouldn't banzai in :op You're not Kilroy Stonekin.
Pull as best you can, then head back to Marshall once you're done with the bosses. There are furnace guardians in there too so try to avoid them, although the second boss is pretty much on top
of one group of guardians so... meh. Give Marshall all the crap he wanted, after which he figures that yes, in fact, his non-twin is dead. Map back to the War Camp.
Quests: Unspeakable Unknowable (Alkar)
Ask the Prospector about High Priest Alkar. Go down the path behind the Prospector, and you'll see the path splits three ways. The SW split is the one we've been using so far, and then there
are two going NE. One goes up and the other slopes down. We want the path sloping down (the left one). Follow the path and you'll soon come across Alkar. Seems this guy is the keeper of that
random temple next to the forest of indeterminate origin we keep finding ourselves in. Take him into SF. OK guys, this quest can get a bit complicated, so I highly suggest reading through this
section at least once before you actually talk to Alkar in here, so you at least have some idea of what you're getting yourself into. When you're ready, talk to Alkar again. Apparently his random temple houses some book in which is written
the true name of the Great Destroyer, an ancient enemy of The Great Dwarf (basically the god of dwarves), and also apparently if one reads the true name of the Great Destroyer out loud it will
unleash it and its army of... things... onto the world. Why would this book even exist? And if you found it existed, why wouldn't you destroy it? HUH ALKAR?!?! Well, he has no time for answers
to my reasonable questions, so off we go. One warning: after the first mob, Alkar buggers off on his own so don't get distracted. Hey Alkar! You're not Kilroy Stonekin, now get back here! He
won't wait for you to pick up your drops so pick them up after we finish the quest unless it's something really shiny, in which case pick it up as soon as it's dropped. As with Kilroy, if Alkar
dies you'll get quest failed and have to restart from the War Camp. Head down to the first res shrine and hang a right. Follow the path til you start seeing stone pillars, at which point stick
to the left side to take a path going down towards the temple. Take out the mob coming up the path towards you, then the one coming up the stairs of the temple. Once they are dead, go down the
temple stairs to where the inexplicable forest starts. Try to pull but you'll probably end up getting the entire mob so make sure you activate the nearby res shrine (to the right at the bottom
of the stairs) and kill the boss. He drops the Tome of the Rubicon, which is the book Alkar wants. If you want to take a quick breather to regen energy and whatnot, don't pick up the book until
you're ready for the next part. Oh, and depending on how fast you've gotten through the mobs, Alkar might have gotten distracted by something shiney along the way so make sure he's actually
with you before you pick up the book. If he's not, backtrack til you find him, then come back and pick up the book. Take the book back to the temple platform and drop it there. Now comes the
hard part.
Once you drop the book, the next part begins, so figure out who's gonna stay behind and protect Alkar. See, Alkar is squishy, being a monk, and also lazy, so for the next part he's just gonna
stand here on the platform. Meanwhile, you need to go find four crystals to blow up the temple, which are dropped by special Dredge Blastrock enemies. Each time you pick up the crystal dropped by these special dredge
a mob spawns and attacks Alkar, so you need some people to stay behind and keep him alive. You must leave one healer with him, and a minion master or spirit spammer, if you have them. If you don't have an mm
or a spirit spammer then you'll want to leave three people total (including the healer) behind with Alkar. The rest of you should go find the special dredge one at a time and come back to help
keep Alkar alive after each one is killed. The special dredge are marked by your quest starburst so at least they'll be relatively easy to find, but they are all hanging out with other dredge.
Drop the crystals by Alkar when you get to him. And yeah, not all of the special dredge are in the inexplicable forest and some are kinda far, which makes it harder to get back to Alkar in time.
For the further ones you might want to pick up the crystal and immediately drop it so the mob spawns but carrying it doesn't slow you down, run and save Alkar, then go back for the crystal and
bring it back to the platform. This method gives you a lot more breathing room than you'd have otherwise. Sometimes random smaller mobs will spawn to attack Alkar, so have whoever stayed behind
let you know when they show up, or if you have an all-AI party keep an eye on the HP bars. Once all four crystals have been dropped onto the platform, Alkar says a prayer to the Great Dwarf, and
the temple collapses, burying the Rubicon in the rubble. Talk to Alkar for your reward, then map back to the War Camp for the last part of Sorrow's Furnace.
Quests: Black Moa Chick Miniature Pet (not really an official quest)
OK guys, I know I've been saying this entire walkthrough that anything that didn't have to do with Prophecies specifically wasn't going into this walkthrough, but there's one thing that isn't
really a quest but it crosses through all the campaigns and most specifically has to do with this last part here in SF. If you just want to get on with the SF stuff, skip to the paragraph after
the next "Quests" section,
cause this one's gonna list everything you need to do for this cross-campaign acquisition of a green mini-pet (and if you haven't heard of this before, yes you will need ALL of the campaigns
(Prophecies, Factions, and Nightfall) and the expansion (Eye of the North) to get this minipet). I've mentioned some of these things briefly in the walkthroughs for the other campaigns but this
is the only place I'm going to go into any detail. So, if you do everything in this paragraph you'll end up with a green mini Black Moa Chick. Again, this involves access to all GuildWars-related
games except GW2, so if you don't have them all installed (and, in some cases, played through a fair bit of them), just skip this section. The following bits will assume you've gotten far enough
in all of the campaigns to know what the hell I'm talking about, as walkthrough-like stuff for them belong in their respective walkthroughs. Oh, one more note: You can do this on all of your
characters and end up with multiple black moa chick minis if you really want to go through all that trouble. Also, you can acquire most of the stuff needed for it on any character except the
journal, the incubator kit, and the final part that requires going into SF. Just a note if you're acquiring things on different characters: for some reason the game won't let you drag things
from your storage into your incubator kit; you must put them in your inventory first and then into the kit. Look I don't know OK, Anet is dumb sometimes.
The first thing you need to do is go to the GW:EN expansion, head to Gunnar's Hold (Norrhart Domains), and enter the Norn Fighting Tourney. Fight your way through the first two rounds, and if Zho (who shows up with
her black moa pet) isn't your third-round opponent, map back to Gunnar's Hold and restart the tourney until you get to fight her (she only shows up as a round three opponent). Fun facts about
Zho that are relevant to this: She is one of the ranger trainers in the Factions campaign and only has one eye. Apparently, she lost it when she was tracking black moas in Echovald forest (where
you can, in fact, tame a black moa as a ranger pet) and came upon some random douche getting attacked by one. This random dickhead is a ranger NPC in Istan that you help acquire a pet cause he
sucks too much to get one on his own, mostly cause he's been traumatised from his encounter with the moa. Also, if you bring a Black Moa ranger pet near him in Istan, he and his two non-friends
freak out, which is kinda funny. So, why is this relevant? Well, Zho was terrified of black moas for a long long time, but now she shows up with one? Yep. And if you beat her here in the tourney,
she gives you a copy of her journal, which informs you of how she got over her fear and acquired her own moa pet. Reading it also gives you some vague clues on how to get
one of your own, but I'll give you more detailed explanations. *Note: You need this journal in order to start this non-quest, and you will need it in your inventory for the next
step. I will tell you when you no longer need it. And I say "non-quest" because it's not in your L menu, but you can't do the rest
of this thing if you haven't acquired her journal this way. Also, although she did the same things you're about to do and ended up with a black moa ranger pet, you will end up with a black moa
chick MINI pet, just so we are clear. The only way to get a black moa ranger pet is to tame one in the Echovald Forest, and the details of that are in the Factions walkthrough. If you
then read her journal, she talks about how her phobia generalised to all birds and she knew she had to tame the black moa or go insane. Zho eventually came to realise that she'd need a normal
moa egg and infuse it with the magics found in the Echovald forest, and an "egg chest" from the Luxon turtle breeders to keep the egg safe.
Next, head to the Factions campaign with Zho's journal still in your inventory.
For this part, you must have completed the Gyala Hatchery mission, and yes you can do the mission
even if you're a Kurzick. Go to Leviathan Pits in the Jade Sea, grab 50 spiritwood planks, 10 steel ingots, and 5k from your storage or buy them
from the rare mats trader (although whether the rare mats trader will sell them to you or not will depend on whether the Luxons or Kurzicks currently control the town and whether you belong to
that faction, so you might have to find a different rare mats trader to buy them from), then go through the exit into Gyala Hatchery. Head north to where the name
Gyala Hatchery is on your map to find one of the Luxon Leviathans (giant wooden buildings). Head up to the very top to find Katharine, who is one of the "egg chest" (or incubators, if you're not
a crazy person like Zho who makes up words) crafters for the seige turtle hatcheries. She'll take your materials and the 5k and put an
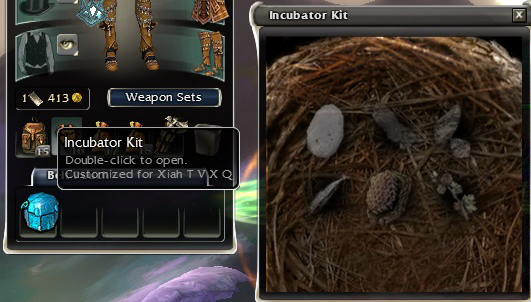
incubator kit in your inventory. If you double-click the
kit you will open it and see there are six slots inside of it (
screenie here). These are for the six things you will need to acquire to eventually hatch your mini.
Well, time to acquire these things (also, you no longer need Zho's journal, so put it in storage or trash it or whatever you want).
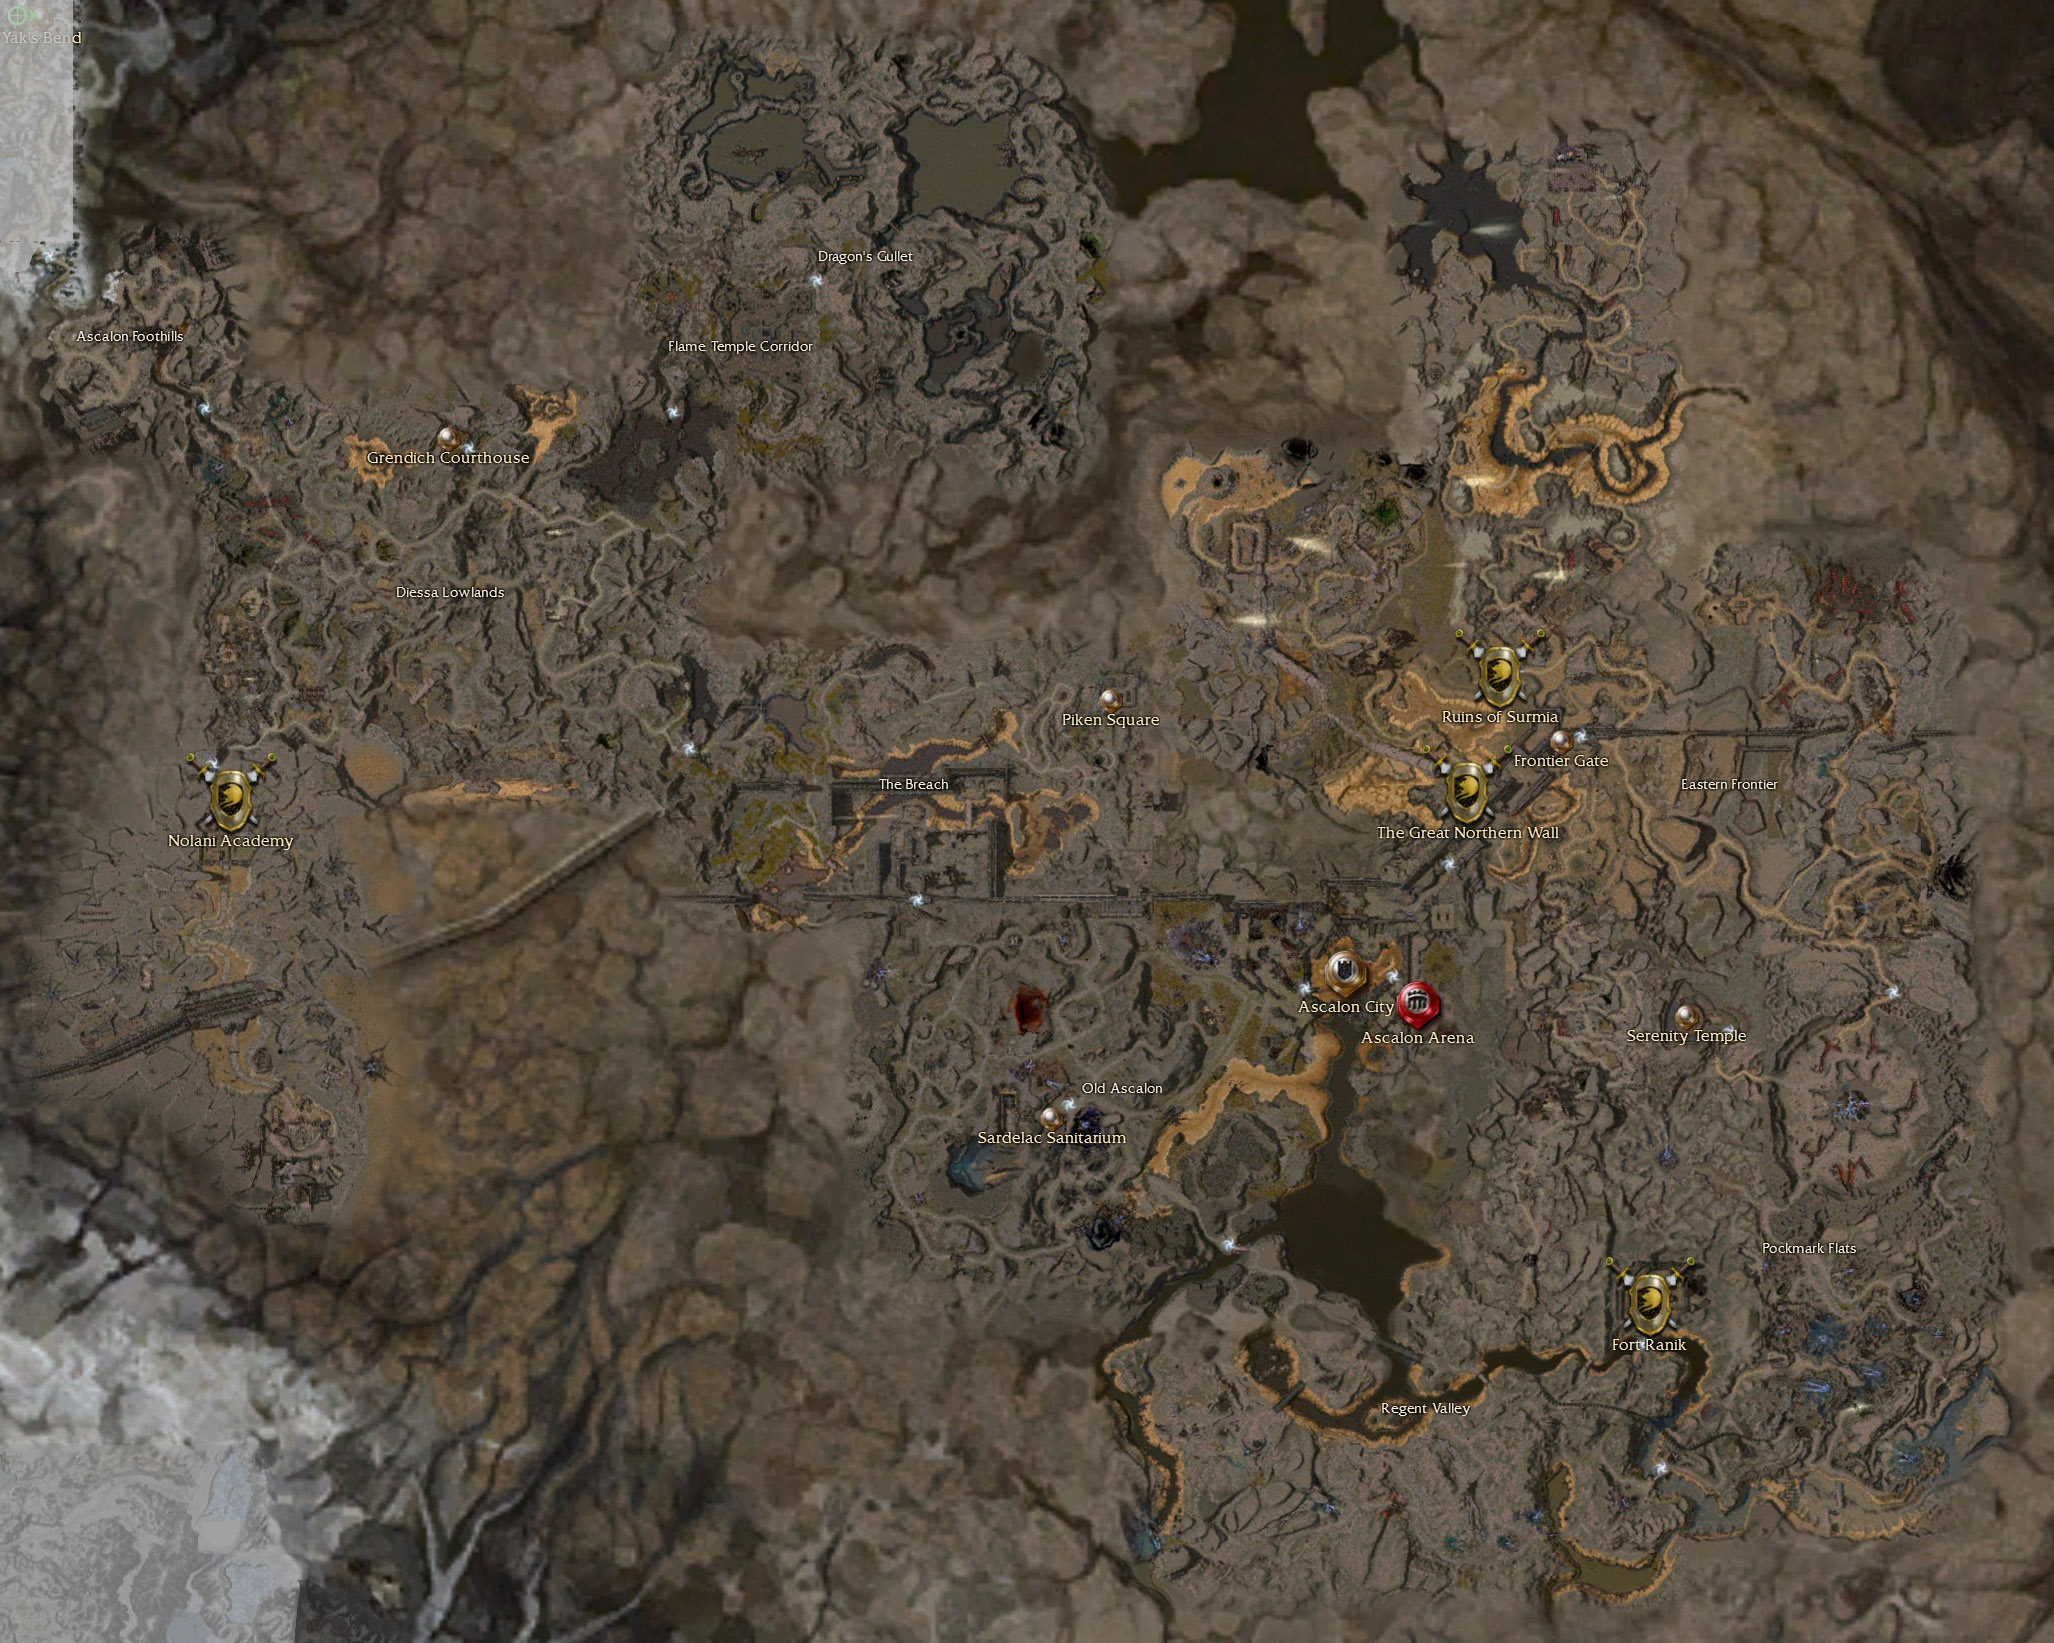
For this part, you must have access to Old Ascalon in the Prophecies campaign. Doesn't matter where in Old Ascalon you've been, as the mission outposts/explorable areas are not
storyline-locked. Use the
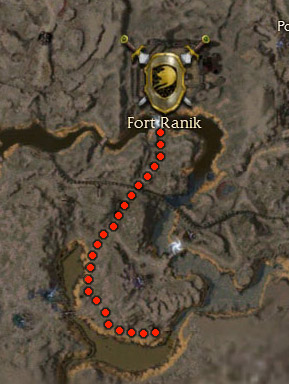
Old Ascalon region map to get to the Fort Ranik mission outpost, then go back out into Regent Valley (
map to egg here),
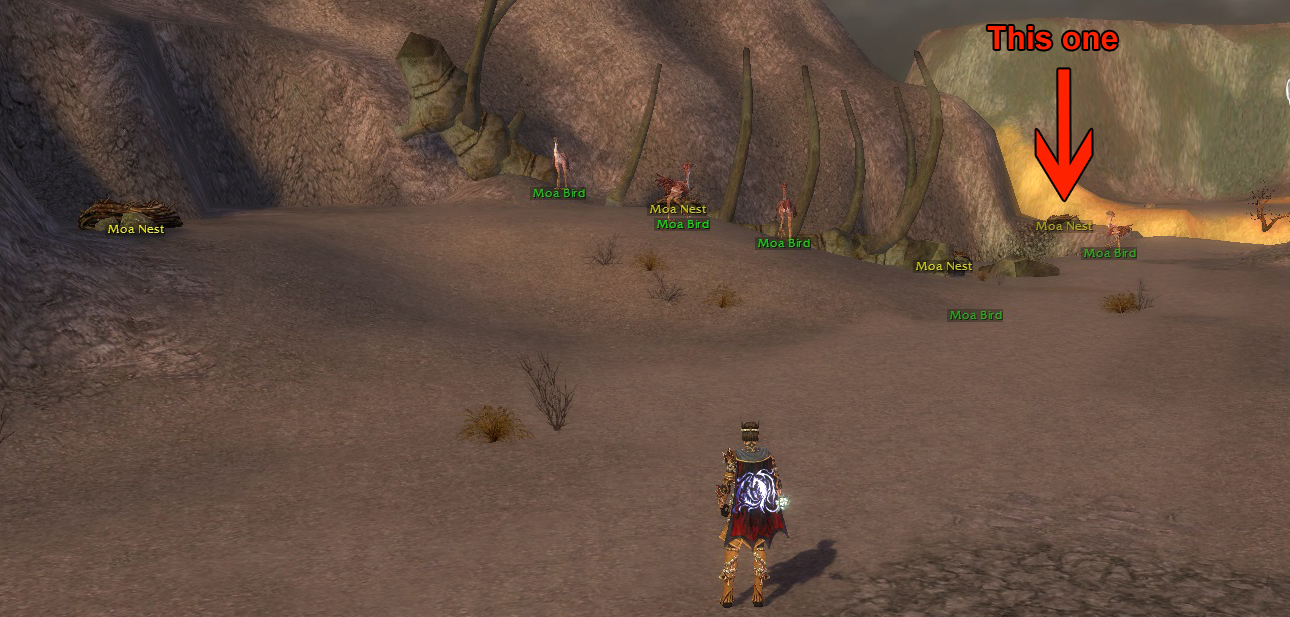
head straight past a mob of charr,
straight through a mob of bandit renegades, then turn left when you can't go forward anymore. Fight your way through the devourer popups and soon the path opens up into an area full of normal,
regular red-coloured moas. If you hold down your left Alt key you should see a bunch of moa nests. All of them are empty except for one. Stand facing the back of the moa area (facing NE)
and click on the nest in the very back that's furthest to the right (
this one). A Moa Egg will now be in your inventory.
This next bit requires having completed the Eternal Grove mission
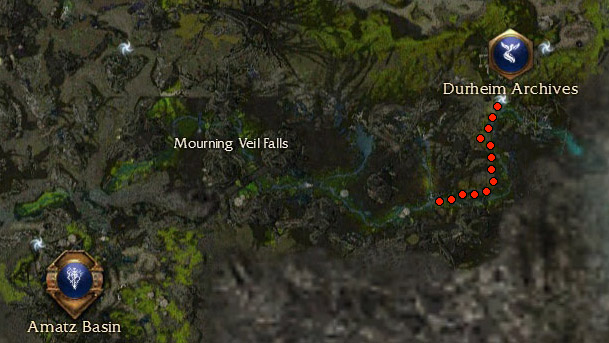
in Factions, and yes, you can do the mission even if you are a Luxon. Map to the Factions campaign and head to the Durheim Archives in Morostav Trail (use the
Echovald Forest region map to get there), then head south into Mourning Veil Falls. Follow the river south then west to reach a clickable Mourning Veil Falls
(hold down your left Alt key) (
map here). Click on it to imbue your moa egg with the essences of the Echovald. Now you can open your incubator kit and place the hardened egg inside (it wouldn't let you
put the normal egg in there before).
The next thing you need is a Honeycomb. These can be acquired in various ways, such as the gifts from Nicholas the Traveler (or his pre-searing self's gifts if you want to make a pre-searing
char and try for those then bring the char over), trading 8 stone grawl necklaces to collector Galton Franks in Sacnoth Valley (GW:EN), or from the GW:EN quest A Hunter's Pride. The quest is
probably the easiest way to do this, but whatever way you choose just acquire one and stick it into your kit.
For this part, you must have access to the Maguuma Jungle in the Prophecies campaign.
Next, head to the Prophecies campaign and kill a bunch of bog skales of whatever type you want (i.e., icetooth and blighters also count) until you acquire five Bog Skale Fins. There are a crapton
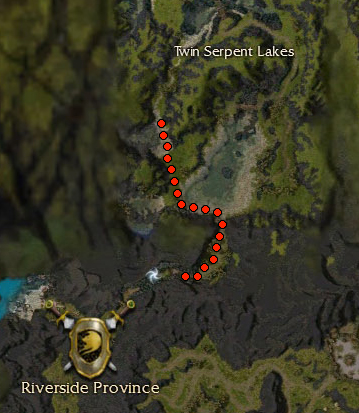
of these things right outside Fisherman's Haven (town just north of Sanctum Cay between Maguuma and Kryta). Once you have five map to Riverside Province and head out into Twin Serpent Lakes. Take
a left when you get to the beach, head northwest, and you'll find Gruhn just a bit further along the beach (
map here). Trade her your fins for a herring, and don't slap anyone with it. Trouts are what you
use for slapping people, not herrings. Anyway, once you have the stinky dead fish put it in your incubator kit.
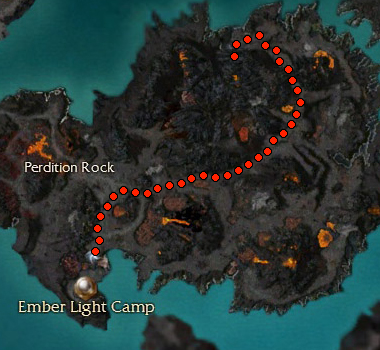
For this part, you must have completed the Thunderhead Keep mission in Prophecies, which takes you to the Ember Light Camp in the Ring of Fire Island Chain. Map to the
Camp and go out into Perdition Rock. OK guys I know I usually give you play-by-play directions for these things but there are like zero landmarks out here. It's so samey-same... ^=__=^;; so
you're just gonna have to make do with
the map. Sorry :\ After you find the clickable Pile of Volcanic Rocks, click on it to acquire one, then put it in your kit.
Next place we're going to is the Nightfall campaign. For this section, you must have done the Consulate Docks mission in Nightfall and completed the quests The Great Escape (i.e.,
rescuing Koss, which is a primary), and started Chuno's drake quest chain (Drake in a Cage and Feeding Frenzy). For those of you who have been following my Nightfall walkthrough you'll
have already done this part and I would've told you to keep the quest reward item, so if you didn't listen you're gonna have to do it again (it's repeatable). Map to the Sunspear Sanctuary,
then go out into Marga Coast. As the big red letters say you must have done two of Chuno's quests involving his drake already in order to do this. Grab the Insatiable Appetite quest from Chuno
and feed Toma some more. He's gotta eat at least five enemies for you to get the quest reward, which is a branch of Juni Berries (for every increment of five (i.e., 5, 10, 15) enemies eaten you
get another branch, in case you're thinking of getting moa minis for multiple chars). Once you have the branch stuff it into your incubator, which is getting pretty crowded at this point.
This is the last item we need to get! Woo~
For this last bit, you must have completed the Moddok Crevice mission in Kourna). Go kill a bunch of harpies here in Vabbi (if
you've been following my Nightfall walkthrough I would've told you to save their wings). There are a bunch of harpies in the explorable area we're going to though, so up to you where you want
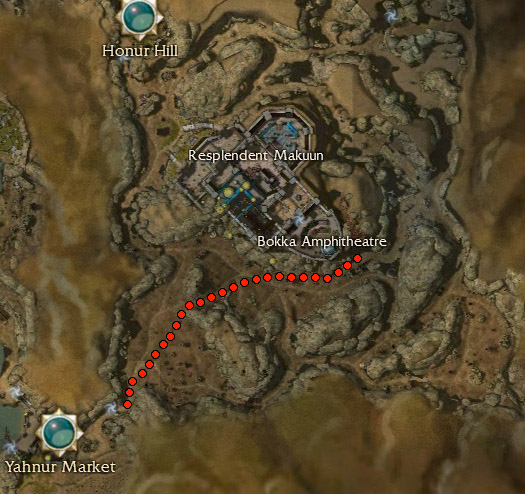
to get them. Once you have 5 Skree Wings map to Yahnur Market (town NE of the Chantry of Secrets/Wehhan Terraces, or
SE of the Kodash Bazaar) and go out into Resplendent Makuun. Head straight forward til you hit a mountain, then go left around it and you'll see a giant building up ahead. When you get to it
go right and keep following the wall of the building to soon reach a collector named Nuwisha (
map here), who will gladly trade you some Nesting Material for your harpy wings. Now, I know the item description
says "Fragile, cannot be dropped or traded" but putting it into your storage box is just fine if you need to give it to one of your other chars. Put it into your incubator kit, then map back to
the Deldrimor War Camp for the last stage of hatching this thing, and our very last SF quest, since, if you've been reading Zho's journal, you'd know that you need to place the egg into Sorrow's
Flame to hatch it. What is Sorrow's Flame? Well, we're about to find out...
Quests: Final Assault, The Forge Heart
For those of you who are hatching the black moa minipet, make sure all of the incubator kit items are inside the kit and that you have the kit with you in your inventory.
Talk to the Prospector for your To Sorrow's Furnace reward, then grab his next quest. He wants you to talk to Ennis Granitestrider, who's directly behind you. While his intro dialogue directs
you to Galen Trask, ignore him and click the Final Assault button to acquire this quest. Lead him and his tag-along buddy Budger Blackpowder into SF, then talk to Ennis again once inside. Seems
he wants us to destroy something called an Iron Forgeman, and Budger here is the man with the master... splosions. Well, who said splosions can't be a plan? Go down to where our signpost-Dredge
used to be, being careful of the patrols, then take out the Furnace Guardians by the gate. Go up to the gate, then talk to Budger to acquire a powder keg and drop it next to the gate to bust it
open (don't worry, the powder keg isn't into friendly fire). In this area, make your way south through the two bosses and blast open the gate (the southmost one, not the east or west ones).
After the path turns left it's a straight shot directly east through the crushers (make sure you time it properly and stop after each one so you don't go splat) and across a stone bridge. There
are two more bosses in this area, near the next gate you need to go through (the gate straight ahead after the stone bridge). Make the bridge be like a leaf and blow, then head on through. After
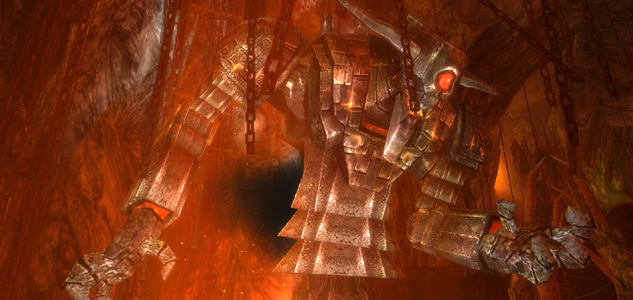
the turn in the road you'll soon come into the area the ragebinders are in. Keep going straight until you hit the res shrine (you'll see the Iron Forgeman we're supposed to kill right in the
middle of this area) and start clearing out the patrols near the shrine. Any patrol that comes near the shrine needs to die, just in case, so wait by the shrine until you're sure you've gotten
them all (one of these patrols has two bosses in it). Once the shrine is clear, continue across the wooden bridge towards the Forgeman. Pull the Furnace Guardians out of the gate, kill them,
then wait for a bit. There's a patrol that goes around in a circle in the area inside the gate. When they get close, pull them outside and kill them (ignore the Rage Binders for now). Don't
worry if your minions aggro the Rage Binders, since they don't move from their spots. Just let the minions die. One last thing before we get on with this thing. If you are hatching the moa
chick, park the rest of your party outside of the gate (not on the gate, out of aggro range of the gate) and go stand in the gate. Anyone else in your party who wants to hatch the mini should
stay with you though. Everyone who wants to hatch the moa chick stand right on the gate. The Iron Forgeman will attack you. He has two attacks, but the one you must get hit with to hatch the
chick is the one where he pours lava on you. The lava must hit you. If the incubator kit is still in your inventory after it "hits" you, then it didn't really hit you so just wait til it hits
you. Hopefully all the attacks hitting you won't kill you, but if it does your other party members should be fine and we already cleared the res shrine anyway. Once it hits you run back to
your group (careful cause Budger likes to bodyblock you when you're trying to get back. You might need to go a bit forward from the gate to get the Forgeman's attention, and you can see the lava
being poured so if it's not doing damage to you go stand in it. Once it is successful the incubator kit will be destroyed and the black moa mini will take its place. Now, let's get on with it.
Go inside and go in a circle around the Iron Forgeman like the patrol did and kill everything that isn't a Rage Binder, then run back outside the gate. See, the thing is we need to kill the
Rage Binders but we have to have killed them all within a very very short period of time, otherwise they respawn. This is much easier to do when everything else is dead. The Iron Forgeman will
still attack you but don't worry too much about him. Just make sure to move any AI members of your party out of his lava attack. The best way to do this is use a lot of degen and move on to
the next one before the first one is killed, as the degen will kill it while you're working on the next one, and lather rinse repeat. Once all three are dead, RUN BACK OUTSIDE AAAAHHHH (i.e.,
after the cutscene). If you have minions, they will probably aggro all of the flame djinn that came out of the Iron Forgeman, so if you have minions run the hell away back to the shrine. Once
all the minions are dead, head back up to the gate. The flame djinn don't need to die at the same time so no need to rush here. These djinn are the same as the one we killed in an earlier quest,
so therefore their Consuming Flames spell is the only thing to worry about so if you have interrupts save it for that spell. After all three are dead, the quest is finished, so talk to Ennis,
who is the dwarf who ran here during the cutscene. After you get your reward from him, talk to the Prospector to get your reward for Final Assault. Yaaaaaay we are done with this place forever~~
well, unless you're a big huge weirdo and want to do this entire thing all over again, since all the quests are repeatable. But who in their right mind would want to do that~ Although I suppose
if you're going for max survivor title this is a relatively easy way to get a lot of EXP (personally I just did FoW clears for that but hey, whatever floats your metaphorical boat).
There's Something Looming on the Horizon
Everything Went [BOOM]
Of Princes and Kings and Banishings
I've Got Snow in My Boots
Corpsicle Alert!
From Snow to Sand in 2.5 Seconds
Of Lions and Lambs
White Mantle, Coast to Coast
In the Jungle, the Deadly Jungle
The Shining Blade's Labyrinth
Fear and Loathing in Maguuma
Ascension Contention
I Don't Think Desert Makes a Very Good Dessert
Do Not Meddle in the Affairs of Dragons, For Thou Art Crunchy And Taste Good With Ketchup
I Never Thought I Would Go Back to the Shiverpeaks. You'd Think I'd Remember to Pack Cold Weather Gear
Infusions and Invasions
These Are Not Hot Springs
Still Lava Rivers Run Deep
Tying Up Loose Ends

