First things first: Yellow Trinities. Back in Traverse Town, choose Magician's Study, then go behind Merlin's House and use the Yellow
Trinity to move the boxes. Climb up to get a Power Up. Next, to Agrabah.

In the Cave of Wonders, enter the Hall area and locate the Yellow Trinity halfway though the room. You end up pushing the pillar doooown
into the chasm. Go down the stairs nearby, then look left to see the pillar you just dropped. Jump to it, then to the ledge above
to enter the Hidden Room. Activate Mr. Monkie, then go left and grab the Thundara-G and Meteor-G gummies out of the chests
there. Teleport out, and head to Neverland.
Choose Ship: Hold, then go through the door, beat up the Heartless, climb (or fly) up the ladder, and use the Yellow Trinity to open the
door. Destroy the Shadows, then open the chests for an Orichalcum, a Dispel-G, some dalmations, and Aero upgraded to Aerora.

Try to have gotten all of the Clock Tower items before coming here. I'm only missing four... ^>__>^ Anyway. Go through Neverland to get
to Hollow Bastion. ... pshah, I'm still using Potions... :oD
You land on a rock, Sora has some deja vu, and Donald blames it on hunger. ^O__o^;; And the building growls at you. ... ^o____O^;;;;
Jump down and head forwards and right around a large rock to find a chest with some dalmations in it. Back to the SP, jump onto the ice
platform, and keep going forwards. Find the ice platform going up and down, and jump onto that one to reach a large floating rock. There's
a large bubble floating nearby. Jump into it, and you end up underwater. Fun stuff. aaaahhh, breaatheeee... Go right for a Dispel-G, then
wait for yer air to run out, at which point yer returned to the surface. Back to the SP, then back to the large floating rock. This time,
jump up onto the next series of ice platforms. ... aw, Beast... well, somebody's pissed... ^.__.^ Bad Riku, no cookie! ^>__<^!! ... wtf is
he talkin about Keyblade Masters fer? ... oh yeah... remember, waaay back in Traverse Town... when Leon had the Keyblade, and the Keyblade
said "no dice" and went back to Sora? And THEN Riku took the Keyblade, and the Keyblade was all, "cool beans"? REMEMBER?! ^O__O^;;;; ... cause,
ya know, I pointed it out back then for a reason... ^>__<^! (Keyblade: Bah, Sora sux... and Riku's hot!) ... huh. Who knew the Keyblade was
so... fickle... bah! tchah, toy sword and fickle friends... *kicks Donald and Goofy* y'all suck... ^-__-^;;
And now you get Beast onyer team. ... and you should be real glad about that. Rememberrrr? Waaaay back when? On Destiny Islands? The night of
the storm? (yes, lots of remembering being done today) Well, ifya didn't listen to me, and tried to fight the Heartless with that wooden sword
of yours (i.e., before you got the Keyblade), you would've realized that the wooden sword does nothing against them. At all. Only the Keyblade
can do any damage to a Heartless. And, of course, your allies. So be really glad you've teamed up with Beast...
Anyway. Give Sora a bunch of Potions (or whatever yer usin for healing items) in his item slots, cause like I said, he can't do damage, so he
needs to be the healer. Go through the archway and onto the platform. Find the moving ice platform and glide to it (if you haven't learned to
glide in short bursts of glide-and-fall-and-glide yet, well, yer gonna haveta learn now). When it's at it's peak, glide forwards for a chest with
a Dispel-G in it (augh, can't carry any moooooore... ^>__<^ ). Make your way back up to where you joined up with Beast, then locate the two moving
ice platforms close by. Jump to the lower one, then glide to the chest for a Megalixir. Look right for another chest on the other side of the area.
There's a Blizzaga Ring in there. Back to the archway, jump back on the moving ice platform, then to the one above it, then to the area above that.
Head up the steps, and a floating platform-type thingy transports you to the castle.
Ifya wanna try yer luck against some Heartless, go forwards towards the double doors at the end (Which are locked, by the way, but EXP!!). Just make
sure you stay out of the way and let Beast kick the arse. There's actually only two sets of enemies, so meh. Like I said, the gates are closed, so...
back to where you were, and go down the steps there. The gate opens itself for you. Go through to find two crystals. Poke the red one first, then
poke the blue one, which calls a platform to take you down to a lower level. ... yes, you could've jumped, but what's the fun in that? ... OK, OK, I
see yer point... ^>__>^;;
After Beast kills off the Darkballs (what a creative name...), go forwards to find two of those large bubble-things. Jump into the one that's higher up. Open
the chest above your head for a Mythril. Look left (i.e., away from the wall) to find a ledge. There's a chest up there with a Tornado-G in it. Press
R1 to Lock-On to the switch behind you (yes, it's made of ice), then examine it. Jump left to a platform near the block that just came out of the wall,
then look towards the back of the area to locate another chest. There's a Tornado-G in that one, as well. Go back to where you found the Mythril, then
jump back onto the ledge that the ice switch was on. From there, look left for another ice ledge. Glide to that, and inspect the other ice switch to
release the other square thingy. Jump across the two square platforms you released, then go left through the dark hallway into the Waterway.
To your left is a chest behind a gate. Move to the right, and examine the bars. ... woah. I'd hate to have him mad at me... ^.__.^;; There's a
chest at the back with an Esuna-G in it. Back outside, jump off the balcony, then into the lower of the two bubbles. Yer in a different part of the
Waterway now, and there's a Firaga Ring and an SP in here. Unfortunately, without Goofy and Donald, you can't teleport to the gummy ship (*shakes fist
at them!!* ^>__<^!! ). To the left of the SP is another area of bars that Beast can destroy. Find the bubble, but cast Blizzara on it. Quick now,
cause this doesn't last long! Jump onto the frozen bubble, then left onto the "wall" between this room and the SP room. From there, turn left and glide
to the chest for a Flare-G. Jump into the bubble.
Go left and have Beast destroy more stuff. Enter, have Beast destroy the Heartless, then open the chest for a Float-G in each. Back in the Waterway, head left, and left again, then inspect the switch on the wall. Move on to the next switch,
release, go right and around the corner for the next switch, and release that one as well. Now, go back, past the other switch, and release the one on
the floor. Jump into the bubble, then release the switch there to get up to the next level. Go down the hallway, have Beast destroy the Defender, then
release the last crystal. Go back down the hallway and leap into the bubble. Hit the switch on the floor, go down to the end of the "hallway" and around
the corner, hit that switch, make fun of Beast attempting to get past the grating ( ^~__~^;; ), go back and hit the switch you just passed, then leap into
the bubble at the end of the area. Go left and take the higher bubble to get back outside, have Beast defeat the Darkballs, then activate the crystal at
the end of the area to get back up to the castle. Let Beast take care of the enemies in front of the gate, then go through the double doors.
Cut to all the Princesses of Heart and Kairi being held captive by Maleficent. ... I don't think Riku would be too happy if he knew what she was doing to
Kairi... ^>__>^;; And... this is
her castle, how does she not know where the stupid Keyhole is? ^>__<^ Beast senses something... stupid Shadow!
... stupid Beast! Now yer all alone... ack, Riku! ... nice wardrobe change. ^>__>^;; Yay Goofy! ... not betray? So why j00 leave earlier ^-__-^;; Stupid
Donald too... ^>__>^;; Anyway... don't need a weapon, huh? So... why the wooden sword? :op Yaaay Keyblade! (Keyblade: ... haha, I love to mess with their
heads... ^_^!) ... Ack!
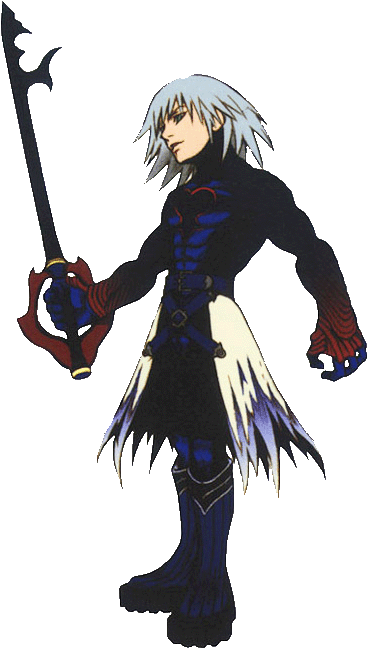 Boss: Dark Riku
HP: 500
EXP: 2,000
Attacks: sword skills
My current level:
Now
this is a hard fight! He moves so freaking fast! Just keep hitting him, cause the chances of you landing any spells on him are pretty much nil
(plus, Fira doesn't work on him, and I'm not about to try the others...). Sometimes, he stays still for a bit, and sometimes you (or Goofy and Donald) make
him stand and fight. Hit him with Arcanum and Sonic Blade! Watch your HP, and eventually this fight will be over. This is one of my favourite fights,
since it's actually somewhat challenging without being annoying.
Haha... there goes yer wardrobe... run, pansyboy, ruuuun! Run away like the coward you are! Beast's back... silly dude. You gain the ability to use White
Trinities! w00t! Whelp, go back to the SP, so we can teleport out of here and get those White Trinities. Go out the doors behind you, take the platform at
the end of the area (not the one where you have to go left), then jump down to the archway and activate the White Trinity in the middle of the shallow pool
for a Firaga-G. Glide to the end of the area, then teleport into Waterway. Take the bubble in the other room, then go left into the Dungeon. Use the Blue
Trinity for a Mega-Ether, a Cottage, and a Mega-Potion. Go back to the SP and teleport out again.
Get another Clock Tower item if you can, then teleport to Ship: Cabin. Go out the door, take the door on your right, up the ladder, then out the door. Defeat
the Heartless, then fly up to the topmost level (not including the crows' nests). Use the White Trinity there to get a Meteor-G. Leave the area and go to
Atlantica.

Choose Triton's Throne, then leave the area. Fight fight fight! Now, head for that big purple round area in the middle. On the path inside that is another White
Trinity that gives you an Orichalcum. Leave, and go to the Coliseum.
Keep going forwards and you'll find another White Trinity about halfway to Hercules. You get Donald's Violetta staff. Now... Agrabah!
In the Entrance Hall of the Cave of Wonders is a White Trinity on your left, which gets you a Comet-G. To Traverse Town! (have you noticed yet that I like warping
as opposed to actually flying places yet...)
Choose Magician's Study, then talk to Merlin and choose "To the cavern." Go down the stairs, then go left for another White Trinity. You get another Orichalcum.
Fun? To Deep Jungle!

The quickest way to get to where you need to go is to do the Jungle Slider mini-game all the way through the five levels... but ifya don't want to do that, then just
head to the cliffs, then High Jump and enter the Cavern of Hearts (where you locked the Keyhole). Make your way to the top (now that you have High Jump and Glide it
shouldn't be a problem), then enter the Cavern of Hearts. ... another Orichalcum. Meh. Toooo Mooonstroooo...
OK... Go Chamber 1, jump up and left to Chamber 2, across the room into Chamber 3, left into Chamber 2, right into Chamber 5,
then into Chamber 6. Drop down on the other side of the room and use the White Trinity there for a Thundaga-G. To leave, take the portal nearest you to
get to Chamber 3, then go to Chamber 2, then 1, then teleport out. Now... Wonderland!
Choose "Queen's Castle," then enter the Lotus Forest. Use the two toadstools in the "niche" to get up to the top branches around here, then go towards where you
came in, and enter the portal stuck in the left corner (when facing where you came in). Jump into the chimney, then inspect the painting to get back to that
secret area of the Lotus Forest. The White Trinity there gives you Sora's Lady Luck keychainthingy. Jump into the little pond-thingy to get back to the
Bizarre Room, then jump into the hole near the real floor to get to the Tea Party Garden, and I hope you know your way out from there... ^>__>^;; Now... um...
Halloween Town!

Head to Moonlight Hill via the Graveyard. In the left-hand corner (in the back) is another White Trinity. Use it to get a ... OK... there is NOTHING FREAKIER
than to be doing the Trinity thing, and during the movie SEE A BUNCH OF WIGHT KNIGHTS ATTACKING YOU!! AAAAHHHH!!! Anyway. You get a friggin Comet-G... stupid
Wight Knights... ^>__<^ And... that's it. Back to Hollow Bastion!
Choose Rising Falls, then make your way to the Castle Gates. Enter, then make your way up the staircase, then inspect the doorway in the
back. There are four emblem pieces that we need to find, but first things first. In this same little alcove-type area, but right before
the doorway into the previous room, look on your left (when facing into the entrance hallway). On the wall to the left of where yer looking
is a... triangle thingy hanging on the wall. Jump a couple of times in front of it until you're hanging on to its edge, then flip up and
flip up again to stand on a ledge. Across from you is a chest with a Power Up in it. Leave the area and move left to the double doors
at the end there. Hello, library!
Move forwards and go right to find a red book on the ground. This is Khama vol. 8. These books have no importance outside the library,
so don't worry about the names so much as the first letter of the names. To the right of that is a bookshelf with a row of red books in
it. Inspect it to put Khama vol. 8 back on the shelf. Woo, moving bookshelf. ^O__o^;; Anyway. Examine the pillar on your left to turn
it. Turn it until you can open the chest, and grab the Elixir. Turn around, go up the staircase, and do the same thing with the pillar
there for a Mythril, and the other pillar gives you a Mega-Potion. There's an SP up here, by the way. Right next to the last pillar is
a bookshelf with a row of orange books... with a green book in it. Inspect it to get Mava vol. 6. Theon vol. 6 is on the table near the
SP. Put it where you found the Mava book. Push the switch you just revealed to unlock some doors, but don't go through them yet, cause
we're not done here. Back by the desk again is a Green Trinity. Use it to get Azal vol. 3 off the top of the bookshelf. Jump on top of
the lower floor's bookcases. Glide to the chest near the entrance to get a Dispel-G. Glide across to the top of the bookshelf that's
next to the first pillar you turned to get an AP Up. Now, look right. There's an enclosed area of books on the lower floor that's right
before the upper floor's balcony. Glide into that enclosed area, find the row of green books, Lock-On to the blue one, and inspect it.
This is Salegg vol. 6 (I take it whomever disarraged the library doesn't like the number 6... ^>__>^;; ). Turn around and find the row
of blue books, and put Salegg vol. 6 in there. Go back to where you entered the library and put Azal vol. 3 back on the shelf. Go aaall
the way around to the back of the bookshelf you just moved to find Nahara vol. 5. Go back upstairs and put Nahara vol. 5 in the row of
books behind the desk. Grab Mava vol. 3 out of the row of purple books. Turn around and jump off the balcony. Turn around again and
find the green row of books, and put both Mava books in their places. Grab Hafat vol. 4 off of the desk there, then go back upstairs and
put the book into the row of purple books. Save, then enter the Lift Stop (i.e., through the opening you just revealed, not the doors you
unlocked earlier). Go left, and Lock-On to the chest up there. Cast Gravira, then open the chest for a Tornado-G. Examine the crystal
to take the lift up to another area. Do the same with the chest up here, then open it for an Ultima-G. Get thee back to the Library (hey,
that rhymes... ^>__>^;; )
Save (by the by, you can now teleport out ifya need to, and get those other Clock Tower items), then head through those doors you unlocked earlier.
Go around and light all the candles by casting Fira on them. Glide to the hanging platform in the center of the room to get
that Emblem Piece you just uncovered (this is for that door that had things missing from it). Back on the third floor of
the Entrance Hall, find the statue with the Red Trinity in front of it. Activate the Trinity to push it off the third floor.
It hits the ground and breaks apart to reveal another emblem piece. Across the room from where you pushed the statue is a
stone thingy. Examine it, and it says it�s got a lightning bolt on it. Cast Thundara on it to activate two platforms that
move up and down between the first and third floors, in case you need to get back up here from down there. Turn around, face
the wall, then go right and find a statue. It says to prove your strength by moving it. From its right side, push it onto
the square to make a chest appear on the second floor. Now, across the room from there is another statue that says to show it
your crushing power. No, actually, he doesn't mean cast Gravira. Break the two pots on either side of him to turn on a fountain
on floor I. The fountain spits out another emblem piece. Jump down to the first floor, grab the Emblem Pieces on the floor
and in the fountain, then open the chest (it's to the right of the fountain on the second floor) for the last piece. From there,
inspect the emblem door four times to put each piece in.
Cut to Riku whining like a lil baby. Waah waah waah. Hellooo hooded (now glowing) guy from the Secret Place on Destiny Islands.
*kicks him* Riku so greedy... *kicks him too* Oh look, he glows now too. Fun.
... um... turn around. No, I don't know why yer facing that way. Save if you like (in the Library), then go through the door,
but I warn you, if you go back in there, you'll have to fight a bunch of Heartless (in the Entrance Hall, I mean). By the way,
the pots on the first and second floors have HP balls in them, if you chose to go back and save. Enter the Lift Stop (through
the Emblem door), and examine the red crystal on the other side of this area (left). Go back and examine the blue crystal. At
the end of this area is a chest that you need to cast Gravira on. There's an Orichalcum inside. Back up on the previous area,
examine what used to be the red crystal, then go back and examine the blue crystal again. Fight off the Darkballs, then go
through the doorway at the end of this area.
There's a platform at the end that takes you back to the Dungeon if you have some sort of pressing business there (it also
causes that platform to be available in the Dungeon to get back up here later if needed), plus you get some EXP down there as
well. Back up on the previous level, use the other platform thingy to access another area of the Lift Stop. Examine the red
crystal for some MP balls and a Mythril, then go back to the Waterway, then through the doorway to the Lift Stop. Examine
the blue crystal, then go past the red one and through the doorway to the Castle Gates (other side from where you came in earlier).
Try not to get knocked off here, or you'll end up in the Rising Falls. If you do, then just examine the crystal, and start over
from the original side of the Castle Gates. Go left, and left again, then examine the red crystal. Jump on the platform as it passes by, then glide to the
orange platform and cast Gravira on the chest to release some more dalmations. Back on the moving platform (yes, it'll come
around again, wait until you see another moving platform, then jump to that. Or glide... whatever works. Stay on this platform
for awhile, and you'll see that it takes you really close to two chests. One has a Holy-G, and the other has another Orichalcum.
Back near the doorway where you entered this area, examine the only crystal that actually glows when you go near it.
This is the Great Crest. Examine the red crystal at the end of this area. You get to be attacked on this platform, feel
special. When the Wizards are gone, examine the crystal that's appeared in the middle of the platform. When you land, use
the Blue Trinity for two Cottages and a Megalixir, then open the chest in the back for a Dispel-G. Go left and through the
doorway (it's down the steps) into the Lift Stop (annoyed of the Lift Stop yet? ^@__@^;;; ). Examine the blue crystal, then
go through the doorway into another area of Great Crest. To your left is a chest with yet another Orichalcum in it. Examine
the crystal on the other side of the area.
You are now in the High Tower area. Beat up the Heartless, then cast Gravira on the chest to get a Thundaga Ring. If
you can still carry Float-G gummies (i.e., didn't have to leave the ones in the Dungeon behind), then continue reading this
paragraph. If not, skip on to the next one. Alright, from where the blue crystal is (near the doorway), glide straight out,
then turn right. There's a hole in the side of the castle with large pipes sticking out and going down from inside it. To
the left of that is what seems to be an alcove. Land in there to find a doorway into the Lift Stop. Cast Gravira on the
chest to get the Float-G, then go back outside, glide to the approximate area where you saw the hole I mentioned earlier, then
just let yourself drop. You should be back on the Great Crest area, and examining the blue crystal to your left should take
you back up to High Tower.
Go to the other side of the area, and in a corner on your left is a red crystal. Examine it to
lower one of the huge blocks on your right. Now, enter the doorway near the blue crystal.
Destroy the Heartless, and go through the doorway on the other side. More with the destroying of the Heartless, then examine
the red crystal to lower the other huge block. There's also a chest nearby that you need to use Gravira on to release some
more dalmations. Jump up the blocks, examine the crystal to raise the block back up, then go up it. After defeating the
Heartless, open the chest for a Megalixir, then activate the crystal. Go back down the blocks, left around the corner, then
through the doorway into... the Lift Stop. Go through the other doorway to enter the Castle Chapel. Much talk between
neo-Riku and Maleficent, who doesn't seem to realize that Riku's changed... ^9__9^;; er... Keyblade? ^O__o^;; Blaaaah, Riku's
talking in an even more monotone voice than usual. *whomps him* Go forwards, and Maleficent bullshits you. Fun.
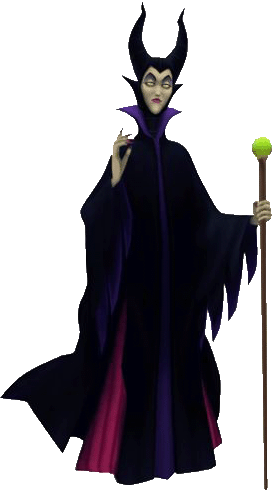 Boss: Maleficent, various Heartless
HP: 900
EXP: 6,000
Attacks: summoning various Heartless, some Meteor attack, green fire, physicals
My current level: Sora: 47, Donald: 45, Goofy: 48, Beast: 48
Ignore the Defenders, unless you run out of MP. When you Lock-On, switch targets to her stupid platform and deplete its HP.
When you do that, she comes crashing to the ground (avoid getting squashed, please), and you can now attack her with Arcanum
and the like. When she does her green fire thing, she turns into a little ball of green light (like Jafar did in the first
fight with him). Destroy the Heartless around you while she's like that, then her platform thingy revives itself, but just
repeat as before. Shouldn't be too difficult...
After you win, she retreats into a portal, acting like she's having a heart attack. Ha! A little too much forya, huh? :oD
Donald learns Cheer, and you get Ansem's Report 5. An SP appears on your right. When yer done replenishing yer items and
saving and whatnot, enter the portal Maleficent so stupidly left behind. Ha, gasping Maleficent. ... it does what now? Ack! Well then... ^<__<^;; Well,
crud.
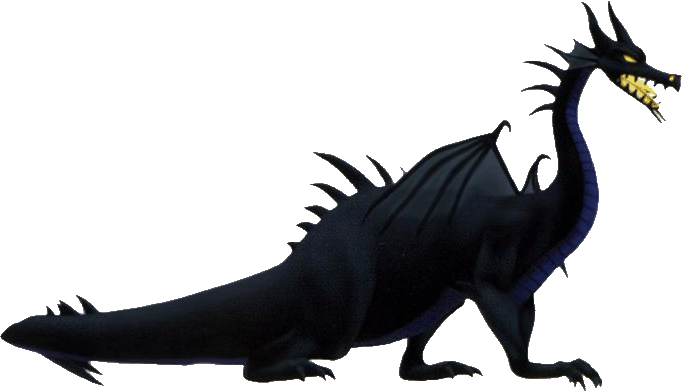 Boss: Maleficent, Dragon-mode
HP: 1,200
EXP: 6,000
Attacks: Breathing green flames, stomping on party members, rearing back and pouncing, biting
My current level: Sora: 47, Donald: 46, Goofy: 48, Beast: 48
Official walkthrough gives you a different way to beat this thing, and insists that it's a hard fight. Me, on the other hand...
think it's quite easy. Heck, I'm
still using Potions! :op
She's a lot like Cerberus, cept climbing up on her back won't do you much good. Not only is it really hard to do so, but she's
got an incredibly long neck, so you can't really whomp her head from there. Just stay on the ground and keep pressing X.
When she comes down to breathe flames, unleash your combos! Yes, the green flames can hurt you, even when they're just on the
ground. Let Donald and Goofy heal you, and this battle shouldn't last very long... really...
Maleficent falls to the ground and is consumed by her own green flames. Ewww, black smudge on the floor. Blech. Riku talks
a lot, then runs away. You get Fireglow! (new summon) Restock yer item slots ifya need to, then go back through the portal
you followed Maleficent into. ... apparently, Riku knows better than to leave a portal behind... Save, then head right through
the new doorway into the Lift Stop. Watch it, cause you can fall off here on the right. You might want to go back and stand
in the SP to regain HP/MP after Donald and Goofy use up MP to defeat the Shadows... ^-__-^;; Continue through the doorway,
then open the double doors there. Hellooooooo Princesses of Heart. Yeah, you can look at em all you want without getting
attacked. ... go fig why Ariel wasn't a Princess of Heart... too selfish maybe? Beh, who knows. I don't like her anyway...
When yer done bein a busy-body, go forwards and up the steps. ... boing? Hrm. Guess Goofy's out of this one...
^O__o^;; Hey, look. It's Kairi! ... again! No, of course he's not Riku, weren't you paying attention? Like, to the voice(s)?
And him calling her "that girl"? Stupid Sora... ^9__9^;; ... ow. Heh, seems Sora's heart isn't his own. Hi, Ansem. You still
suck. ... and... there goes Donald. ... ^-__-^;; Yep, yer on yer own for this one... good luck. Aaaah, dun keeel meee...
... who said the what now? ^O__o^;; Clang! Yaah, no heart for j00, stoopid Ansem! Ahahaha!
Boss: Riku-Ansem
HP: 900
EXP: 8,500
Attacks: sporadic, flurried swordplay, throwing his Keyblade, energy blasts
My current level: Sora: 48
OK... all this ado for nothing, really. The other fight with Riku in Hollow Bastion was a lot harder than this. See... the
thing is... Ansem sucks. A lot. Riku's a lot better fighter. Ansem's just fast, and is all over the place, but he's really
not that hard to beat. He just... can't fight. Tch. Just keep hitting him and do Arcanum when you can. Make sure to
leave some MP to cast Cura, though! Cause you'll more than likely not be able to use any Potions during this fight. When he
says "Behold the power of darkness!" is when he starts with the being all over the place thing. This is when you're gonna
really want to watch your MP meter, cause it's really hard to get in hits starting now. This is also when he starts with the
real attacks, like throwing his Keyblade and the energy blasts. ... it's also also when he's really really low on HP, so...
WHOMP! :oD (... tchah, I didn't even need to heal myself at all this time...)
You learn Ragnarok after beating him. Whee! Riku-Ansem collapses and disappears, leaving behind his Keyblade. Yeah, yeah,
the Keyhole... weren't they paying attention when Ansem said that the Keyhole wasn't complete? Doi... ^-__-^;; ... hellooooo
evil Keyblade of DOOM... ^<__<^;; ... heh, the kowaii Sora grin of DOOM, too. So much doom today... oh look, even more DOOM.
^>__<^! Ah well, at least it released the six hearts of the Princesses of Heart from the evil Keyblade... and Kairi's from inside
Sora... who's now goin "Hello, light." ^X__x^;;; ... as Donald has a temper tantrum...
Yes, as we all stand around with our hands out, who should appear but Ansem. In his true form. And wants to kill Kairi, lil
Miss Pouty. Oh, look, Riku's come to his senses and decides to... um... stop being a puppet? *snickers* Donald still cracks
me up. :oD RUN AWAAAAAAY!
... er? *poing*? Er? ER?! *flails* ERRR?! OK, yes. You are now... a freakin... Shadow. ... you do realize what this
means, don'tCHA? All those Heartless you destroyed used to be people who'd lost their hearts! ... fun, huh? ^>__<^ Ah well.
Go forwards (no, I don't know why the Princesses of Heart are still in there if they have their hearts back...). ... gaah,
this lil guy runs funny. The good thing about being a Heartless is that you don't get attacked by other Heartless. Through
the Lift Stop, enter the Castle Chapel, hang a left into the Lift Stop, go right, head towards the crystal on your right, and
jump. Yes, I said jump. Yes, off the High Tower. ... what're you waitin fer, a written invite? Go go go! ^>__<^! Turn around,
jump down to the lower level, then turn around (towards the clouds), and take another flying leap down. Another flying leap
to the Rising falls, then approach the crystal to get up to the Castle Gates area. Go through the front doors (ack, make the
stupid Shadow stop lookin at me funny! ^>__<^! It's creepy.). Yeah, yeah, "a" Heartless is after you. Oooh... go say hi to
yer friends (yes, there was another way in here, which didn't involve the jump down into the Rising Falls, but then yer party
would've been facing the wrong way and pointing to a Shadow that wasn't there, and I'm a stickler for things that make sense...).
*BONK BONK* OI! ^@__X^!! Some friends, huh. ^;__;^ ... and no, I have no idea how the hell she recognizedya as a Heartless...
Eheh... more Shadows. Ack, leaping Shadows of DOOM! (... yes, more DOOM. It tastes like pie. DOOM pie, specifically...)
Awww, the power of luuuurve... I hate mushy crap. ^>__>^;; ROAR! ... oh c'mon, they're just Shadows! We can take em! ... oh,
FINE! ^-__-^;;
Blah blah, telling Leon the story, blah blah, yay earisu! ^~__~^ Lots of talking, and... Leon gives Sora a pep talk? Who knew.
Heh. Talk to everybody, and earisu (Aeris/Aerith/whatever) pretty much explains what Leon was wondering about (the Princesses
of Heart stayed behind to hold back the darkness). She also tells you to talk to Cid. ... you also learn that new types
of Heartless are popping up. Actually, all the Heartless you saw in Hollow Bastion have invaded every world. Fun, no? mrr...
Go talk to Cid! Yer actually in the Third District right now. You can avoid the Heartless below by gliding to the door
to the First District, but ehhhh, EXP! wai. :op Lots of talking done by Cid, and he talks about a new navigational Gummi.
Basically, what he's saying is you get a warp hole directly to Hollow Bastion, but like it matters. I mean, we coulda just
warped there, right? And the Heartless ships really aren't that hard, but ehhhh... whatever. Try synthesizing new
stuff, then teleport to the Magician's Study. You can take the route through the Alleyway, but ehhh.. I like teleporting
:oD Actually, you might want to take the long way to attempt to get synthesis items... personally, I only need two more items
to finish the menu and be able to synthesize the Ultima weapon... :oD
If you teleported to the Magician's Study, talk to Merlin and select "To the cavern." Head down the stairs, then talk to
Kairi. Well, run to the mural! Which... spits out the other NaviGummi. Go back towards Kairi again, and a scene ensues.
Heh, much heartfelt talk... much complaining by Kairi cause Sora won't let her go, then Kairi gives you the Oathkeeper
key-thingy. Heh. Yeah, it looks funny, but it's damn cool as a Keyblade... even if it's just a tad less powerful than the
Metal Chocobo. Talk to the Fairy Godmother to release Mushu (summon) from Fireglow, and she gives you Donald's Lord Fortune
staff for releasing all of the summons. Beat up some Heartless if you'd like, or buy new weapons for Donald or Goofy in the
Item Shop, then talk to Cid (by the way, the Grand Mallet is pretty much the same as Violetta, it just looks different).
When yer done, board yer gummi ship, then enter the warp hole below Traverse Town. Ignore the Coliseum thing for now. When
you land, Beast is with you, and says that Belle is still in the castle. Jump up to the shallow pool where the White Trinity
was before, then turn towards the SP and find the nearest bubble. Jump into that one, then run forwards to the chest to get
a Defense Up. Head to the Castle Gates, then enter the Library. Go up the staircase, and Beauty and the Beast are finally
reunited. ^~__~^ Belle explains what I explained earlier, about them holding back the darkness, then talk to her again to
get the Divine Rose key-thingy.
Leave the Library and go through the "Heartless" door on the second floor of the Entrance Hall. Go through the doorway at
the end of this area, then left and examine the crystal that glows blue when you approach it (the first one you come to).
Go left and examine the red crystal. Yes, the platform that you get attacked on again. Fun, no? Blah blah, you know the
drill. When you land, go left, jump down, and go through the doorway into the Lift Stop. Examine the blue crystal, then go
through the doorway. Go right and examine the crystal, then go through the doorway in front of you (if you want, you can
beat up the mizillion Heartless that appear if you go left). Go through the doorway at the end of this area. Go left, up
the blocks, left around the corner, then through the doorway. Mrr. ... haha, I just noticed that whenever you smack things
with Divine Rose, a bunch of rose petals fly out. Haha. *ahem* Anyway. Yeah. Through the doorway. Helloooooo Princesses!
... again. Yes. Talk to them all and stuff, then use the SP. ... yes, Ansem is a freak, we knew that already. Through the
doorway! Through the next doorway! To the Keyhole! Oh, wait. Not yet. When you reach the steps, go left for a chest with a
Flare-G in it. Clear out all of the Heartless, then on the right side of the room (when facing the Keyhole), jump up onto
the ledge there and go right. Open the ches in the middle to get the Oblivion key-thingy. w00t! Keep going around on this
ledge thingy, and at the end (after it becomes a purple-magenta-ish whatever-coloured platform) is another chest... with the
last set of dalmations in it. Yay! Now... enter the Keyhole! (... yes, I said "enter the Keyhole")
Mini-Boss:
WHYYYYYYY do they keep eating my damn pages?? ^;__;^ Will fix later, I promise! Sorry!
The Coliseum: Hades Cup
Dive to the Heart
Destiny Islands
Traverse Town
Wonderland
The Coliseum
Deep Jungle
Locking Traverse Town
The Coliseum: Phil Cup
Agrabah
Monstro
The Coliseum: Pegasus Cup
Atlantica
Halloween Town
Neverland
The Coliseum: Hercules Cup