Well I guess we're watching the Midnight Channel tonight again. Nobody cares about your weather news, lady! That's what the weather forecast option on the telly is for! Some girl appears on
the telly. Time for pokey pokey round 3, fight! Aweh, nothing new happened. Well, time for bed I guess. So sleepy... eh? Oh goddammit Igor. Why you kidnap me again. I'm not a genie, stop
summoning me. He gives you a key to the Velvet Room and explains that you're gonna need his help to solve this mystery. And then proceeds to ramble on about weird stuff. Long story short, he's
telling you that, unlike your other party members who only get the one Persona, you can have multiple Personas. His "wild card" nonsense is also another way of saying "Well sometimes when you
ask me to fuse a certain Persona I fuck up and give you a completely different one instead," so pr0 tip guys: if you are really invested in fusing a very specific Persona I highly suggest you
SAVE before doing so or you're gonna want to try to punch Igor through the screen. And since IRL you don't have the ability of pokey pokey you're just gonna end up with a busted monitor and/or
television. Igor also talks about the Social Links granting power to Personas thing but I already explained that properly on the previous page and these pages are long enough as it is so I'm
not gonna say it again!
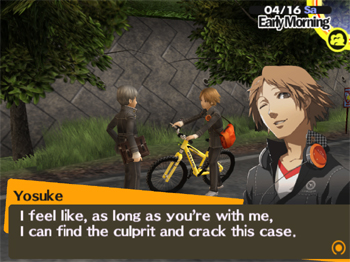
On your way to school Yosuke catches up to you on his squeaky bike. Apparently he saw the Midnight Channel girl last night too and wants to go ask Teddie about it after school. Even though
you have the option to refuse his offer the game won't let you so don't even bother (plus, why are you playing this gaaaaame if you don't want to fiiiiiix iiiiiiit??). Regardless of your answer,
this conversation initiates the Magician Arcana Social Link with Yosuke. Not all S. Links (btw, "S. Links" is now an option in your menu, where you can check what rank each of them are at) will
affect things in battle but for all of your party members it does. So for all party members, initialising the S. Link will enable them to take a mortal blow for you in battle. Other abilities
unlock as you rank up in that specific S. Link. In most cases, you gain points towards the next S. Link rank by choosing to spend time with that specific person (compulsory ingame events usually
do not count for this though, which is why I said "choose"). Some S. Links work differently but I'll go into more detail when we get to those specific ones. For the most part, you can hang out
with Yosuke on Mondays, Thursdays, Saturdays, and Sundays (and sometimes other days), as long as it's not raining. Actually, very few S. Links like the rain so most rainy days are a complete
wash in terms of ranking up your S. Links. On school days (btw, Saturdays are also school days) Yosuke will be on the same floor as your classroom (the second floor), near the library. If it's
Sunday or a holiday he'll be at Junes.
At school Chie shows up in a mild state of panic, stating that she thinks the girl on the Midnight Channel last night was Yukiko, and that she hasn't been able to get in touch with her since early
yesterday evening. After calling the inn, however, it turns out that Yukiko hasn't been thrown into any tellies, but instead of being relieved she decides to bitch Yosuke out. *sigh* Later,
at Junes after some shenanigans Teddie informs you that no one has shown up in the TV world. You all decide to watch the Midnight Channel tonight, and part ways. The scene switches to Dojima
and Adachi at the previous crime scene, along with some cop who seems to be completely mesmerised by that manhole cover... Maybe he thinks the serial killer is hiding in there? Or perhaps he saw
one of those mythical sewer gators and is trying to decide if he should tell Dojima to back away from it or if that would just get him locked up in the looney bin. Regardless, Dojima and Adachi
theorise about the case. It seems the politician's wife, the singer chick from the faceless posters, and the politician himself both have solid alibis for the day of the crime. Dojima says that
the only connection between the first and second cases is that Saki went to the same high school as the daughter of the owner of the inn where Mayumi was staying to avoid the scandal. ... and
then seems completely surprised to learn from Adachi that the news already leaked that information. DAAAAAAAAAAAAAAD. YOU WERE SITTING RIGHT THERE IN YOUR LIVING ROOM RIGHT NEXT TO US WHEN THE
NEWS TALKED ABOUT THAT. There's even a screenshot of it on the previous walkthrough page! ^<________<^;; Dojima is bad at paying tenshunz~
Back at home, go up to your room and watch the Midnight Channel. ..... uhhhhhhh... nice rack. YEAH THAT WASN'T WEIRD AT ALL. ^.________.^;; Yosuke calls you and tells you to meet them at Junes
in the morning. ... what I want to know is how he managed to walk through the entire store without anyone having so much as the slightest pause to wonder where this guy is going with these
sharp weapons. But nooooo, it takes Yosuke doing Insanity Psycho Blade Aerobics By Ted Bundy for anyone to notice. gg Yosuke, you just got us arrested. ^T__T^ DAAAAAAAD CAN YOU BAIL US OUT
PLZKTHX?? Oh hey, you are. Well that was convenient. While Dojima is lecturing you, some cops stroll by talking about how Yukiko has apparently really disappeared this time. Adachi comes along
and confirms it. He also lets slip that the police think that Yukiko's disappearance might've been on purpose and that perhaps Yukiko killed Mayumi as revenge for Mayumi's bitchface causing
Yukiko's mum to collapse (which is why Yukiko is even filling in as manager atm). On your way out Chie finds you guys. You explain what happened and that they took your weapons. Er... Chie
apparently thinks she's like Superman or something and can actually fight. Well, on the bright side for some reason she knows where to buy weapons. Yosuke hands you 5k and Chie comes up with the
"bright" idea of hiding your gear under your uniforms. I don't know if you've noticed, but Chie cuts her school uniform's skirts in half. I'm not even kidding, hers are half the length of aaaaany
other female student's. 1) Can we say attention whore? and more importantly, 2) HOW DO YOU CONCEAL ANYTHING UNDER THAT. Whatever, Chie, I need to just remember that you never make any sense ever.
OK, time to buy gear. Look, despite expectations the chain mail isn't that much better than your T-shirts, and the weapons aren't too much better either. I would just get the Hunting Nata for
Yosuke cause his current hit chance is rubbish (anything lower than 90 hit chance is pretty frustrating unless you just have the luck of the gods or something). We have better things to spend
our money on so just exit out of the store after that. Er... OH GODDAMMIT IGOR. Can we get, like, some sort of anti-kidnap gear or something? Maybe put a bell around Igor's neck so we can hear
him coming? ... yeah Igor, saying you give birth isn't creepy at all. Please keep talking. I enjoy these moments together. And that background music doesn't give me headaches at all! Anyway,
when he's talking about Personas being hard to grasp what he means is that sometimes after a battle you'll get the chance to acquire new Personas. This is called Persona Shuffle, cause they
appear as cards and will either fly around the screen in circles or function like a game of memory and you have to pick two matching cards to get that card or be in three rows and spin like slot
machine reels. The slot machine version is a particularly annoying one, so yeah they have varying degrees of difficulty in terms of aquiring the card you actually want. Also, the flying around
the screen version comes in many different speeds. Margaret then tells you about the Persona Compendium. This is like a database of all the Personas you acquire. When you acquire a new Persona
card after a battle this Persona is automatically registered in the Compendium on aquisition, unless you are already holding your current max number of Personas (the max number of Personas you can
have on-hand increases every few levels or so and maxes out at 12). If you're already maxed out then you must discard a Persona you are already carrying to be able to automatically register the
new card. However, as I explained before, Personas gain levels separately from your personal level gain. When this happens it is not automatically recorded in the Compendium, so you will have
to come back to the Velvet Room at a later time to physically register them yourself. Registering Personas is free. Also, if you have a Persona registered in the Compendium and you somehow end
up getting a new card of that same Persona after a battle even if you keep that card it will not overwrite the previously-registered version. However, if you wish to overwrite the previous version
with the newer version you can do that by physically registering it yourself in the Velvet Room. Another thing about the Compendium is that since it saves your Personas there that means you can
withdraw them from there at any time as long as you have space (to dismiss a Persona you are currently carrying go to Persona in the menu, highlight the one you want to get rid of, and press
Triangle). However, withdrawing a Persona does not delete it from the Compendium, and also is not free. You do get a discount to the withdrawal cost when you reach 25%, 50%, 75%, and 100%
"completion" of the Compendium (where completion means having one of each Persona in existance registered, but they don't have to have their levels maxed out or know all of the skills they can
learn or anything like that). After his very short, very confusing explanation, Igor CLAIMS that from now on you will come here of your own free will but I don't believe him ^<__<^;; He also
then kicks you out of the Velvet Room and won't let you back in again til tomorrow (usually you can go in and out as often as you please so I don't know what his deal is today).
So this is the first time you're allowed to walk around town, however you can't leave the shopping district to go anywhere other than Junes today. At the bottom of your screen you'll see a
glowing blue butterfly flying around. This is a save point. This one will always be here. There's also one in your classroom in the back corner opposite from the door, although you haven't
seen it yet. The only other ones in the game are in the TV world. One is at the entrance where you always land on your butt when coming in, and then each dungeon has one on the very last floor
right outside the final boss room. Alright. Currently nobody in the shopping district has anything important to say but we do have things to buy. Go right down the street until you find the
Shiroku store (it has 四六 in the store name, and if you don't have Japanese characters installed that will just look like boxes to you ^=__=^;;). It's the last store before the division between
the North shopping district and the South shopping district. In front of the store is a blue vending machine. There are four vending machines in the shopping district but only two will sell
you stuff and each will only let you purchase five drinks (although the other one will sometimes give you five free ones randomly). From this one purchase five cans of TaP, then head right into
the next section of the shopping district. Two buildings down is another vending machine but this one doesn't work. However, talk to the lady in this building and buy one grilled steak croquette
and one steak skewer. You can buy one of each every day, but you can't buy any super croquettes unless it's raining. On rainy days you can buy five supers though, but still only one each of the
other two. The steak croquette restores 25HP, and the other two items restore 50HP each, and they're relatively cheap (definitely cheaper than buying Medicines anyway). Continue down the street to find a pair of vending machines. They're both
stuck together but it will only let you buy from one. Buy five of whichever you want (they all do the same thing). TaP Soda and the sodas from this specific machine all restore SP (TaP restores
10 and the ones from this machine restores 5). The other vending machine by Shiroku also sells Orange Crush but that only restores 10 HP which is really stupid, and trust me you will be glad you have the SP ones instead. Also,
each vending machine will only let you buy five cans total (not counting the random five freebies you might get from the furthest one), not five cans of each option. When the machine is empty it
says "it appears the machine is refilled periodically." Basically after every story event (S. Link rank ups don't count) they will be refilled, even if it's one day after your previous purchase
(so, today there will be a story event after we leave the shopping district and tomorrow you can come back and buy more cans, but they don't get refilled every day). Go back to Shiroku and enter
the actual store this time. Buy as many Medicines as you can afford (don't worry about tomorrow's purchases cause we're about to make some cash) then leave the shopping district and go to Junes.
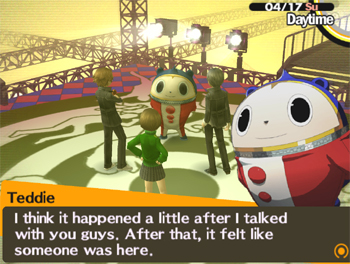
Upon your arrival in the TV world you find Teddie literally lost in thought. Of course Chie is thrown off by someone calling her Miss. After all, she's a dude. Teddie points you in the direction
of where he senses someone came into the TV world. Chie runs off like a lunatic, and when you catch up to her you find a giant castle. So our current working theory is that the Midnight Channel programme
is a result of the kidnapped victim's Shadow expressing that person's hidden emotions. Teddie confirms that he senses someone inside the castle, and Chie... runs off again, like a lunatic, this
time leaving us in the dust. I swear, does she have anything inside that cavernous thing she calls a skull? Talk to Teddie to receive some items, then head on inside. OK, so like I said before,
this game has monsters on the field. Very rarely you might open a chest and you get a Shadow instead of loot, but for the most part all of your non-boss battles will be from enemies you can see
on the field. This means you can run by them if you want but as I said before, the larger they appear on the field the more aware of you they are so it's highly unlikely you'll be able to outrun
a large one. Also, if they hit you first or from behind they are pretty likely to get a pre-emptive strike on you in battle. If you hit them first or from behind, however, you have a chance of
getting that pre-emptive strike. This is more likely to occur if you hit them directly from behind. Use X while on the field to swing your weapon. Also, before we get going, do me a favour and
hit the Square button. Choose "Change battle tactics" and put Yosuke on Direct Commands so you can tell him what to do, otherwise he'll just do really random things in battle. I mean hey maybe
some of you like not being in control, I dunno, it's up to you. But I prefer to save my SP if at all possible.
Dungeon: Yukiko's Castle (Part I)
Recommended level: 10
Min level: 8
Available Personas: Slime (Chariot), Ukobach (Devil), Sandman (Strength), Pixie (Magician), Angel (Justice), Apsaras (Temperance)
Mandatory Personas to Acquire: Angel (Justice), Pixie (Magician), Sandman (Strength), Slime (Chariot)
Notable Enemies: Lying Hablerie (weak to lightning), Calm Pesce (weak to wind)
KO Date: n/a
OK here's the deal. Despite the fact that I write my reactions to ingame stuff in these walkthroughs like we are both experiencing this stuff for the first time, obviously nobody writes a walkthrough
of a game they've never played before. However, I'm not in the habit of giving unnecessary spoilers. I will tell you however, that Chie is on the second floor of this place and that you SHOULD
NOT go up to the second floor until we've levelled up some. Or, more accurately, levelled up a lot. I know, I know, this is boring and grindy but the only times you get to level up is in dungeons
and most of your time in the game is going to be spent outside of dungeons, and you do not want to be underlevelled for the following dungeons, trust me. I would prefer it if you got to lv 10
on this floor but lv 8 is fine if you reaaaaaaally can't deal with the grind anymore. Also there's a reason why it says Part 1 in the dungeon description. Anyway. All dungeon descriptions will
have "Recommended level" in them, which is the level I would like you to reach by the end of the dungeon, and "Min level" which is the lowest level I consider safe for you to advance to the next
dungeon. It will also list the Personas available to acquire in that dungeon, the ones I think that you MUST acquire for upcoming bosses or other reasons (and the ones listed in this section you
need to get before going upstairs), and later on will have recommended Personas for the dungeon (since you only
have one right now that would be kinda pointless to list here). Lastly, "KO Date" is the last day you have to complete the dungeon and save the victim otherwise it's game over.
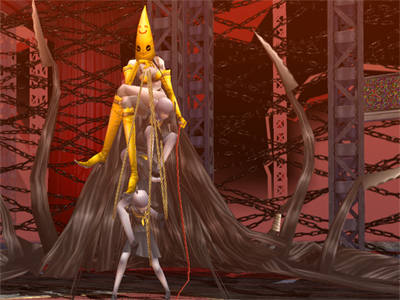
While you're running around levelling, you NEED to pick up an Angel card for the upcoming boss (looks like a lady with wings who had an unfortunate accident with a roll of electrical tape). You
don't particularly need to level Angel, but you might want to get her to at least lv 5 cause Hama is a useful skill to have in your repertoire. It's a light-based attack that is instant death
if it hits (although it has a pretty high chance of missing unless the enemy you target is weak to light, which some enemies are). You
will also want to pick up Pixie (short-haired girl with fairy wings, a blue outfit, and long black boots), Slime (a green blob-looking thing), and Sandman (a guy with a red outfit with a moon
for a head carrying a sack over his shoulder) for now, as you get more points for interacting with your S. Links if you have a Persona with you (not just in the Compendium) that is of the same
Arcana type (so, Pixie for Yosuke, for example, as they are both Magician). Remember that if all your
Persona slots are full you can discard one of the ones you're not using to automatically register a new one in the Compendium. Feel free to acquire the other Personas available for now if
you want, but you'll get another chance to later so don't worry too much about Ukobach and Apsaras for now. While you're levelling yourself you may want to level Pixie to lv 4 but if you don't
get around to it right now don't worry about it. You'll get a chance to do so before you'll actually need her lv 4 skill. Calm Pesce is a pretty resistant enemy that also hits pretty hard so it's no use trying
to save SP on that one. Just use Garu to end it quickly. Oh yeah, I should explain the different cards you find in Persona Shuffle. Any card with a picture on it is a Persona card. Cards with
a bullet hole in them are blank cards. Nothing happens if you get a blank card, although sometimes the game will give you one more chance to acquire a Persona card instead. Black cards with a
red X are penalty cards. If you get this card, all your rewards (EXP, cash, items) for this battle disappear. One more thing while you're running around: Make sure you keep at least one Peach
Seed in your inventory, because you'll need it for a quest later. Try to use items for healing instead of magic outside of battle since you're going to need your SP for the upcoming boss battle.
Also another note about battles: In your main battle menu are two options we haven't talked about yet. Escape allows you to escape from battle but it can take awhile for Teddie to find you an
"escape route," so really unless one of your Personas has a skill that lets you instantly escape from battle expect to have to fight for awhile, or just Guard forever until Teddie lets you leave.
This option is also handy for certain enemies that are impervious to physical attacks and you want to save SP. The other option is only available to you (the main character). Persona option
opens up a list of your currently-held Personas. You can use the Square button from here to see their stats and what skills they have, or the X button to switch to that Persona. Once you've
gotten Angel and levelled both you and Yosuke to lv 10 (or 8 if you are impatient) use those sodas I had you buy earlier to get your SP bars to about 1/3 full for both of you guys (well you really
only need like 12 SP each for this), then head on up to the second floor (don't forget to equip Angel as your active Persona first though).
Open the door to find Chie standing there, staring off into space. You hear Yukiko's voice echoing from somewhere, talking about how she feels so worthless and how the only good thing in her
life is Chie. Weeeeeeeeeeeeeeeeeell... turns out that's not entirely true. Sup, Chie's real feelings~? How've you been? Man, I told you Chie's a real bitch. Hey Chie! Mayyyyyyybe you'd be more
feminine if you, I don't know, DIDN'T HAVE MAN-HAIR. Cutting your school skirts in half and wearing booty shorts on the weekends obviously isn't cutting it. I mean seriously... such an easy fix.
Grow your hair. But again, nothing inside that skull. Kinda like Teddie I guess. And of course the Shadow gains power from her denying its existance and now we have to fight the bloody thing.
 Boss: Shadow Chie, Leader of the KKK
Recommended level: 10 (normal and expert)
My current level: 9 (normal); 8 (expert)
Personas: Angel (Justice), Izanagi (Fool)
Skills: Green Wall (nullifies weakness to wind), Mazio (lightning, all party), Bottomless Envy (special physical attack)
Weakness: Wind
Look, I don't know, OK, she's just wearing a KKK hood for some reason. I didn't make the concept art! Also, if you're wondering why my normal mode game is a level higher for this fight than my
expert mode game it's not cause normal mode is harder, but cause apparently the game decided to give me exactly zero Persona shuffles until I'd already hit lv 7 during that playthrough. Thanks,
game. ^<__<^;; Anyway, she's weak to wind, which is why I had you acquire and equip Angel. Yes, I'm aware
that Sandman also has Garu but he's weak to lightning and Shadow Chie casts lightning magic, so that's a terrible idea if you forget to switch back. :op So, hit her with
Garu and stampede all over her stupid face with that all-party attack you get to do when all enemies on the field are down. Yosuke also has Garu so, DO IT AGAIN! Her HP should be half-gone by
this point cause we're awesome (yes, even at lv 8 she's about halfway dead at this point). However, now she uses Green Wall, which removes her weakness to wind. No worries though. Switch your
Persona to Izanagi and use Cleave and Yosuke's Bash. When she does her staring thing, that means she's about to cast Mazio, which is an all-party lightning spell. Yosuke is weak to lighning,
so have him guard when she does that (you don't need to guard cause Izanagi is strong vs lightning). If you don't hit her hard with the Garu-stampede at the beginning, she'll cast Mazio whenever the hell she wants so sometimes you won't even get a warning to guard.
If she crits someone from their weakness, she will use Bottomless Envy, which is a special physical attack of hers that kinda hurts guys so how bout just do what I say. ^T__T^
If she's still not dead by now, her wind resistance is reverted so after guarding from Mazio you can go back to the Garu-stampede chain from before (remember
to switch back to Angel), after which she'll be dead for sure. You shouldn't even need to heal at all for this fight, even if you're lv 8. And even at lv 8 you could just melee her to death
but that takes forever and you'll need to heal a couple of times to pull it off. Why would anyone do this? Well, I do it cause I have to research all her moves, but I don't know why anyone
else would want to :op Just saying, she's not really difficult, but who doesn't like a good round of stampeding?

After the battle (and a little convincing), Chie finally accepts her hidden side and acquires her very own Persona (who still looks like a member of the KKK for reasons). Whatever you answer,
you still end up leaving for the day. ... yes Chie. We randomly went BLIND. Maybe from staring at your UGLY FACE. That's why we're wearing glasses now. ^<__<^;; You can be as much of a dick
as you like but you're still gonna get stuck being the leader, resulting in initiation of the Fool S. Link. This is one of the special S. Links I was talking about that doesn't rank up via spending
time with people. This specific one ranks up as you progress in solving the mystery behind the murders and the TV world. Also, I haven't mentioned it yet cause it doesn't matter right now, but
usually you need to have a Persona in your deck that matches the S. Link you are choosing to hang out with to get the maximum S. Link points for them, however, the Fool S. Link does not require
a Fool Persona. So long story short you never HAVE to have a Fool Persona on you unless I have you make one for dungeon reasons. Back home, Dojima is still bothered by having to liberate you and Yosuke
from police custody ^<__<^;; Well, might as well go to sleep since we don't have anything else to do.
Monday, April 18
Key events: Chariot Arcana initiated, Quest 23: Who's the Riddle Master!?
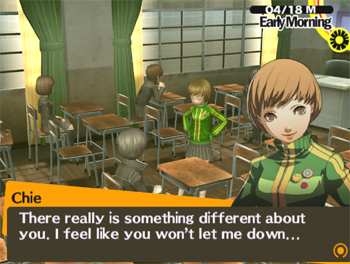
At school the next day, Chie seems to have changed her tune. She's a lot less obnoxious today. When she says that you seem like a pretty open guy, you get a list of replies. This is one of those
"one of the answers has a personality trait roadblock on it, but the answers don't affect anything" questions I mentioned earlier. In order to give the third answer you need more courage, but
no matter what you answer the result is still the same so don't worry about it. I'm just mentioning it in case you try to answer the third one and are like "heyyyyyyy it won't let me do I get a
pony if I am able to answer this or what?" In the future though, if I don't tell you to give a specific response, even if some of the answers are roadblocked, then the answer doesn't matter.
This conversation also initiates the Chariot S. Link with Chie. Usually you can hang out with Chie on non-rainy Mondays, Tuesdays, Thursdays, Saturdays, and Sundays. On school days she'll be
on the roof on the far right side of the screen. On holidays and Sundays she'll be out in front of Daidara (the armour place). Moving on~ classtime~ The definite article he wants is "The," for
points towards Knowledge.
Ahhhhh, finally, FREEDOM. Well, sort of. So, at the very beginning of this walkthrough I said this thing was going to be really anal and scheduled down to the day. Well, in case you hadn't
noticed, we've been railroaded up til now. From today on though, each page will be separated by date as well. I won't tell you this after today but every day you should go buy some croquettes
from Souzai Daigaku, especially on rainy days since that's the only time the game will let you buy super croquettes. Also, like I said before after an event in the main story the soda machines
will be refilled, so don't forget to buy more of the same sodas today. While you're in the shopping district make sure you stop by Daidara to sell all of your materials. If you have enough of
certain materials he'll add things to his for sale list, in any category. Don't forget to buy Chie some new shoes (of course her weapon would be shoes...) while you're there, cause apparently
when she bought herself that chain mail she's wearing she didn't bother getting anything else. Don't bother with
Shiroku today though. You'll see why next time it rains~
Anyway, as you can see there's an SP (save point) at the back of the classroom. Enter the hallway, go straight until you
find some stairs to your left, and go up to the third floor. Right in front of you is some dude with a 'fro for reasons. Talk to him to get your first quest evAr. Tell him that black belongs
in Group A, and that all of Group A's colours are top six flag colours. He gives you three chest keys as a reward. If you go up one more floor you'll end up on the roof, where Chie usually hangs
out (she's not here right now though). There are two chicks up here. The one with the bag will tell you the forecast if you ask her, in case you get paranoid about the weather. Use the Square
button to get back to the second floor and go left. This is where Yosuke usually hangs out. The room in front of the chick standing there is the library. Inspect it so we can gain
some Knowledge (trust me, we are going to need it soon). *WARNING: Studying at the library will take up your entire afternoon, so don't forget to do your shopping
first. Also, make sure you save before studying. If you don't get two "Your Knowledge has increased" messages while studying at the library, reload and keep trying until you do. Yes this is
annoying but you NEED to rank up your Knowledge soon. You will study two different times today. One of these times you can let it go at just one Knowledge increased message but you cannot let
both of them go at just one message. After you study you end up at home. Save, then head up to your room and study at the desk. Again, if you don't get two messages reload until you do. And then the day ends~
Tuesday, April 19
Key events: Strength Arcana initialised
Personas needed: Sandman (Strength), Pixie (Magician), Slime (Chariot)
The next morning... Margaret calls you. See, I told you they weren't done harrassing you yet. Basically she's saying that just doing dungeons is bad and you should pay more attention to your
friends. :op Well that's what this guide's for, thanks a lot Marge, get your own job. This one's taken. :op OK, as soon as school is over, make sure that you have the following Personas
with you, and keep them with you for the next couple of days: Sandman, Pixie, and Slime. If you don't have them, dismiss some Personas (don't forget to register them first if you levelled them)
and go get the ones you need from the Velvet Room door in the shopping district. While we're here I'll explain how this place works. First, choose Check Compendium from the list. As I said
before, the Compendium is like a databank of your Personas. Choose Register Persona to overwrite previous data. You can either do them all at once by pressing Square, or use X to register each
one individually (useful for in the future if you accidentally acquire a duplicate Persona of a lower level than the one you have registered). Choose View Compendium to see all of the Personas
you've acquired so far. From here, you can summon a Persona not currently in your "deck" if you have a free slot (you can't free up a slot from the Velvet Room though so you'll have to go back
outside to do that). You can view them by Arcana or by level, and the amount it costs to summon them is listed on the right. This can get pretty expensive, although as I said before you get a
discount at 25%, 50%, 75%, and 100% completion. Also, I will tell you what Personas you will need under each date so you don't have to scramble and waste cash. I will only list Personas there
if you need to change them though, so if there's nothing listed just assume you still need the ones previously listed. Also, at the end of each dungeon I will tell you what Personas you will
need for the coming days as well since you have access to the Velvet Room from the TV world and sometimes after dungeons the game will throw you into several days of mandatory events without a
break in which to change Personas. OK, use the O button to go back to the first menu and choose Fuse Personas. OK, so the Fusion Forecast will only tell you what will happen if you fuse stuff
today and tomorrow. It doesn't go ahead any further than the current day and the day after. Most of the time, the Forecast will just say None for both boxes. Sometimes, however, good things
will happen, like bonus stats or bonus skills. If there's something in the Conditions box, then the effects only occur if the conditions are met, however often there will be no conditions which
means the effects will happen regardless of what you do. For now, you can only perform two types of fusion: Normal and Triangle. Normal uses two Personas to make one Persona, and Triangle uses
three Personas to make one Persona. In the future you will be able to do other types of fusion and I'll explain them once you are able to do them. In either case, it will list all of the
Personas currently in your "deck" (i.e., that you have with you, not all the ones in your Compendium) on the left. Choose the ones you want to use and other Persona names will appear on the right.
This will show you what Personas you will get if you fuse the ones you have chosen. This isn't random, so fusing Angel and Izanagi together, for example, will always result in Orobas. After you
choose two Personas it will take you to a confirmation screen, where you can see the stats of the Persona you are about to make, and the skills it will have. All Personas come with certain skills
from the get-go. These are the skills they'd have if you got them from a Persona Shuffle, so in the case of Orobas if you got him in a Shuffle he'd already know Agi, Hysterical Slap, and Dekaja.
You'll notice some skills in red though. These skills are skills that he can learn from the "parent" Personas (i.e., the ones you picked to do the fusion) and are random each time. If you don't
like the ones in red, you can cancel out of the fusion and pick the same two Personas again and you might get different skills in the confirmation screen. You can do this as many times as you
want until you get a combination you like, however the more skills a Persona knows the lower the chances are of you getting the combination you want so it can get very frustrating sometimes.
This is also why I hate the background music in the Velvet Room; spending waaaaaaaay too much time trying to get fused Personas to have the skills I want. ^T__T^ The list on the right
will show you Personas that you can make with the Personas you've picked even if you are not high enough level to make them. These Personas will have their pictures blacked out in the confirmation
screen and the game will not let you create them. Anyway, for now you don't need to make anything. You can make an Orobas if you really want to, since you don't need Izanagi or Angel any time
soon, but he'll be available in Shuffles when we go back to rescue Yukiko so it's really up to you. If you do decide to make an Orobas and your Angel is lv 5 or higher, make sure you get Hama
onto your Orobas cause like I said that is a useful skill to have with you.
Alright, back to school we go, with our Personas in tow~ Here on the first floor go right past a dude in teal and inspect the Faculty office to ask about clubs. Oh gods not this guy again.
How can we trawl for girls if we're joining sports teams ^T__T^ What are you even taaaaalking abouuuuuut. Ask about sports clubs (that's the only relevant option right now anyway), then when
you're back in the hallway go aaaaaaaall the way to the other end and inspect the open double doors in front of you (not the single open door to your left). The tour will just show you the guy
you'll be friends with if you join that specific team and doesn't really do anything else. So, here's a quick thing about the Strength Arcana S. Link (which we're about to start here btw). No
matter which team you choose you will meet both of those guys as they are best friends. However, S. Links are the stories of individuals, so which team you pick will cause you to focus on only
one of them. If you choose the basketball team you'll follow Kou's story, which is kinda depressing (but not obnoxiously so). If you join the soccer team, you'll follow Daisuke's story, which
is kinda stupid drama. Not that the stories are bad, I'm just saying that one is kinda :( and the other you're like, ... why was this even an issue...? Also, going to practise (regardless of
which team you choose) improves your Diligence stat so even if you are an antisocial bastard you should join one anyway (but if you're an antisocial bastard whyyyyyy are you playing a game that
requires you to be sociaaaaaaal? ^O__o^;; ). This guide will cover all S. Link branches like this (although Sun is the only other one that does this) so pick whichever one you want. I'm still
gonna get you through them~ Both teams practise on non-rainy Tuesdays, Thursdays, and Saturdays (yes, even though basketball is played inside, no rain means no sports for you). Once you hit rank
three though, you can practise on Wednesdays too. However, there is no practise on holidays (duh) or the week before exams. Oh, one last thing about Strength and Sun S. Links. While you can go
hang out with them by inspecting the doors to their respective meeting places (i.e., the double doors for either sports team, the big red double doors in the practise building for band, and that
one classroom in the practise building for drama), you get more points towards your S. Links if you speak to the person directly to go hang out with them (i.e., if you're going to sports practise,
talk to Kou or Daisuke instead of inspecting the double doors).
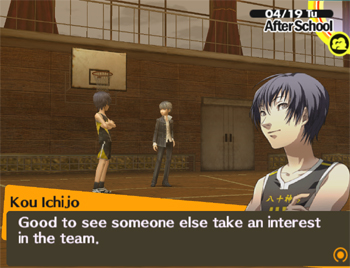
So, anything involving Kou's S. Link branch will be in this colour. After Mr. Kondo introduces you to the team, you watch the team practise. Your teammates are pretty friendly,
but apparently not too keen on taking basketball seriously. Kou introduces himself after practise is over, and Daisuke shows up right after that. ... Daisuke, why are you always clutching your
chest like you're having a heart attack. Are you dying? Please don't die. KOU NEEDS YOU. WHO WOULD HE HAVE LEFT TO INSULT THE FACES OF. COME ON, THESE THINGS ARE IMPORTANT. Kou is disappointed
that his teammates have like zero work ethic. Regardless, you initated the Strength S. Link, so yay. ... oh Kou... why is it that no matter which team I pick I have to deal with you and your
ball-polishing. C'mon man ^<__<^;; Choose to stay and help, don't be meaaaaaan. Daisuke might actually have a heart attack if you don't help out man, c'mon.
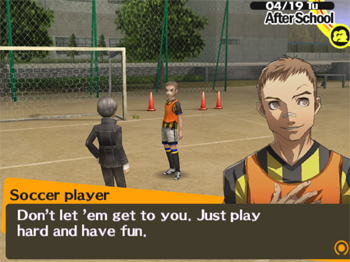
So, anything involving Daisuke's S. Link branch will be in this colour. ... man, your teammates are real dicks. Can... can we change our minds and go join the basketball
team? No? Damn. After they run off to practise, Daisuke stays behind and introduces himself. Kou shows up and introduces himself. Hahaha, yes, actually, both teams are pretty lame... but at
least the basketball guys are nice. These guys are jerks ^T__T^ Daisuke being the only exception, although him looking like he's about to have a heart attack might have something to do with
it. DAIIIIIIISUKEEEEEE, WHY ARE YOU CLUTCHING YOUR CHEST?? ARE YOU DYING? Please don't die, we kinda need you for this S. Link ^<__<^;; The three of you bond over mocking your douchebag teammates,
and you initialise your Strength S. Link! Yaaaaaay~ Daisuke then realises that he's supposed to be, I don't know, practising while at soccer practise, and runs off.
Back at home go upstairs and study. If you got annoyed with reloading on studying before and let it go at one message you need to get two tonight. If you've been getting the two messages the
previous times I told you to study it's OK to let this one go with just one message. Next page time~
The Princess is Totally in This Castle
Carnivorous Magic Televisions