Stick to Block A and Block B for a bit. Level Sasami up if you have her in your party (she starts off at lv. 3), and/or Azaka and
Kamidake (they join in at lv. 2). If you haven't gotten her yet (i.e., you came in the front), head to the Prison area to rescue her. If you came in from
the back, head to the Container to recruit Washu, who's been chillin there for a bit. She joins in at lv. 4. ... yes, you can still get Washuchan
if you came in from the front. ^9__9^
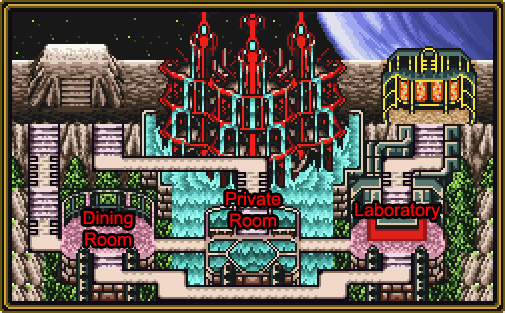
Map of this area.
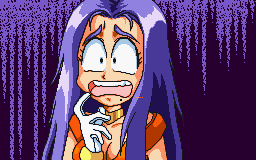
When you're ready, head to the Control Room via the Factory. Shitsuki's apparently been waiting for you. She'll only tell you
what she wants if Ryoko will battle her. Well, OK then. Here we go!
 Boss: Shitsuki
HP: 84
... why the patcher puts her name as "Mizuki" when there's dialogue is beyond me... if you play it without the patch, it clearly says Shitsuki. Anyway.
This time, she actually will fight back if you don't knock off all her HP in the first hit, so move Ryoko all the way forward
and hit her with Plasma Beam. Usually, this'll finish Shitsuki off, but if not, meh. She's easy, and doesn't do a whole lot
of damage. Not much of a boss battle.
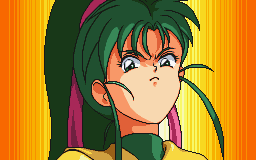
After the battle, Shitsuki disappears, and Ryoko goes after her. ..... whoa buddy. Say hi to the
real villain of this
game. Kusumi. Nice robot thingy ya got there... ^.__.^ She punishes Shitsuki for not finishing off Ryoko, then when Ryoko
gets mad at this, she kidnaps Ryoko, apparently thinking she can trade Shitsuki for her. Err.
 Boss: Kusumi (Amashiro), Ude (2)
HP: Amashiro: 240, Ude: 160
Recommended level: level 6
Here we go! The first real boss battle in the whole entire game! ... and it's for real this time. No "Oh I hit you once and
now you're gonna run away crying cause of a broken nail" type deal this time around.
OK. Choose your characters. I usually go with Tenchi, Aeka, Washu, and Ryo Oki, but eh. Best thing to do is keep hitting
end until you have enough Kiai to morph (yes, you're out of Kusumi's range when you first start out, and no, she doesn't
move around). Ryo Oki's probably your best bet for now. Once you've powered up, move her into the top-rightmost spot you
can get her into (to keep her out of range of the Ude), then move someone else into Kusumi's range, since Ryo Oki has some
high-level multiple target techs. Aeka can be your healer if you keep her un-morphed, but she has some pretty good attacks
when morphed, so that's your choice. Washu can heal people in either mode, which is good.
The fight isn't too hard. Getting rid of the middle section ends the battle, but the Ude can cause some damage.
A good way to deal with it is have two characters attack the left Ude, and two characters attack
the right one (if you're using Ryo Oki, then she's probably attacking more than one target). If you
are using Ryo Oki,
then Bouncing Kitty tends to make her Kiai stop regenerating when in morph mode, so you can revert her on the next turn, then
use Super Carrot Harvest. If you're not leveled up enough for Bouncing Kitties, Cat Crystal works just fine, but it'll just
hit the one target in that position.
After the fight, Kusumi refuses to give back Ryoko and runs off. Shitsuki then wakes up and offers to join you, after telling
you where Kusumi went. Washu then gets Ryo Oki to transform, and off you go! Now comes a series of very annoying fights in
which Ryo Oki is unavailable, as she is the ship yer flyin around in. Now you have to split up into two groups, and you
will be using everybody, so don't do what I did the first time around, putting all the strong characters into one group,
cause I had a hell of a time with the other group. ^x__x^
You finally land on the moon.
Map of this area. Whee, music change! Finish these guys off, then level
up if you need to (remember, they only go up to lv. 8, so don't waste your time trying for more). Both of the options have sucky enemies. Hit em hard
and fast, especially the Gansekiou (the rock-looking things). When you're ready, head to the lab!
Kusumi appears with a brand-new machine. ... either she's got these things lying around, or she's really quick at fixing things... She says she'll give
Ryoko back if you defeat her. Aaaaaalrighty then...
 Boss: Kusumi (Amashiro), Hidarite, Migite
HP: Amashiro: 240, Hidarite: 180, Migite: 180
Recommended level: 7
You can move up about three spaces in front of whichever character's in the front and still be out of her reach. Basically, it's just like the last battle
with her, cept the mech looks different. It's even got almost the same HP.
Afterwards, Kusumi runs off again, and everyone goes into the back room to look for Ryoko... who isn't really Ryoko? Actually, she's been brainwashed by
Kusumi, and cloned. Well, hell. Beat the clones is right. Well, it's not too hard to tell the real Ryoko from the fakes. She's the one in pink. Duh.
:op If you hit the real Ryoko, though... well... game over. So... don't use any multiple-enemy attacks. After that, Ryoko wakes up, and Kusumi's majorly
pissed. She sends some more monsters afterya, but if you're leveled up, then they really don't do much damage at all. After that, you have to fight some
Ryo Oki clones, while Tenchi forgets that the real Ryo Oki is right behind him. That's not very nice, now is it? :op Even though they look rather
harmless, you should get rid of them pretty quick, cause they do decent damage. Next, it's some more dragon-looking things. If you haven't figured out
the basic rule in this game, it's that the oddly-coloured one's always the strongest. So... get the gold ones! ^>__<^ ... well then, I guess that was
the... woah. Yeah, that's big. Where does she keep all these things? *speculates on the size of hammerspace* Ah well...
 Boss: Kusumi (Amashiro), Houmon (2)
HP: Amashiro: 250, Houmon: 220
Recommended level: 8
... well, err... That thing is pretty damn big. ^.__.^ You can only move about one step ahead of whichever character's in front to still be out of her
range of fire this time. Power up as usual, then attack. This time, you might just want to get rid of the middle section first, since it does the most
damage to your party members, and it's an all-party (within range) attack. Taking out the middle thing ends the fight anyway.
You win, Kusumi loses, and Shitsuki beats her up. And Mihoshi's still hungry. (yes, there's a short scene at the end of the credits) And that's the end of
the game!
Breakfast and a Kidnapping


